Friday, March 30, 2012

5 For Friday

1. This week I've been busy working on painting my dining room. Here's a before shot.


IMG_0047

I'll share an after shot when it's all back together again but this and this are the inspiration I'm going with.

2. There has been lots of recording in my house this week. M & his brother J worked on a few songs for our upcoming trip to Ottawa for the Centretown Recording Challenge.

IMG_0024

3. I've been enjoying PL a lot. I thought I would have finished Week 12 for you today but I am behind! I got stuck painting and never got around to finishing the layout. But, I did notice that Ali is planning on doing her Week in the Life in April. I want to participate but I'm not sure how I'm going to incorporate that in my PL. Still thinking about it. Are you going to partake?!

4. I'm not the type to 'link' inspirational videos but frankly this one blew me away on Facebook this week. I rarely go to these links myself but it was worth it to see the look on Simon Cowel's face when he saw this boy & girl duo sing.

5. What's coming up?! I'll have some Simple Scrapper layouts to share early next week and tomorrow I'll have the finished product of those nesting tables from last week.

Have a great Friday. TGIF.

xoxo
K

Thursday, March 29, 2012

Project Life: Week 11

Another one bites the dust-another week that is.

I'll admit that I haven't had the easiest time keeping up with project life but I really do enjoy the project.

I LOVE that it tells the stories that aren't in my 12 by 12 layouts or my mini-albums. It's a combination of the random moments of our life that don't need full layouts but should still be documented. I know that I'll look back at this some day- or one of my kids will-and our lives will look so different but I'll be thankful that I can catch of glimpse of early 2012.

So here's week 11-

IMG_0027

Nothing monumental happened in week 11. I tried something a little different with the date piece-a little tone on tone with the gray using some SC paper and those AC Thickers that I love so much.

IMG_0030

This week we I really tried to incorporate some little piece of ephemera-something I haven't been able to bring myself to do in the past.

I used the UPS slip from my 'guy' who delivers my SC box. He's pretty awesome because if I'm not home he drops the package over the railing onto the back porch. I'm thinking next time he's scheduled to deliver I'm going to leave him a little care package-a.k.a treats in a sealed container- for his efforts. The man is good to me not making me wait an extra day for my fix.

I also included the little tag from the tea that I discovered I now like to drink. That's a big deal for me. If it's not hot chocolate I don't like hot drinks.

Here's a close up of the first page-

IMG_0029

I found that quote on Pinterest and it seemed to fit my week perfectly so I developed it for this week's layout.

Then I also included tickets from the hockey game we attended that week & the business card from our Saturday brunch at the Casbah in the second half of the layout.

IMG_0031

Another full week. Week 12 is almost complete. Hopefully I'll have that one to share tomorrow.

How's your PL going? If you haven't started one it's never too late to start! Sometimes the hardest step to take is the first one-just do it.

xoxo
K

Wednesday, March 28, 2012

And I'm Back

It's been a long hiatus. Sorry for the lack of updates but I've been down and out with the 'death cold'. I've never been so sick in my entire life. I literally did nothing on the weekend but travel from my bed to the couch to the shower and back to the bed. It was a rotating cycle of tissues and medication. Yuck. I wouldn't wish it on anyone. Needless to say, there was very little energy for anything and that included blogging.

But, I'm feeling much, much better now and I'm happy to be back and sharing a few new layouts with you.

These were created almost two weeks ago but didn't have any journaling because my printer ran out of ink. I finally got out to get some and finished them off last night.

You might remember that last week I used the pink die cut paper from the Handmade Studio Calico kit as my background paper. Well I had a second sheet and so I wanted to try using it for misting. This is the result of that attempt.

IMG_0036

 I used a few instax pics here that I've been wanting to scrap that were taken during the Fall downtown in St. John's. This layout was made with 99% of the Handmade kit with a few other little extras added in. Honestly, this wasn't one of my favorite kits but for whatever reason the layouts came together fairly effortlessly. Again, I used those Amy Tangerine letters- they might be my favorite Thickers of all time.

IMG_0044

This is a little close up of those cute American Crafts leaves and a little wooden house that I misted from Studio Calico. Again, you'll notice that I used those little wooden letters that I love so much to stamp some sentiments and captions.

This layout was simple-a little misting, sewing, some letters and just a little pattern paper and embellishing. All products are from the Handmade kit again.

IMG_0041

This title just came to me and was so PERFECT for this photo. It's surprising that a Fall kit with very little red can be so Christmas-y. I think this photo speaks for itself but if not the journaling reads:


'Some of the best Christmas photos are the funny ones taken when gifts are opened around the tree. This year we gave Liam some Baby mustache pacifiers- custom made by me. I caught this shot while everyone was laughing and enjoying our gift giving on Christmas eve- aren't they cute?'

IMG_0043

I was sparce with the embellishments but added a little embossed holiday message from some Hero Arts Holiday stamps.

Last night I also had a chance to work on my Project Life layout for Week 11 & 12. I'll be back to share some PL tomorrow.

xoxo
K

Saturday, March 24, 2012

DIY Design:postponed & Happy Birthday Kristopher!

Folks I've come down with a major case of the flu and am taking a little hiatus from blogging this weekend. I'm spending time NOT running and rather lying in bed or on my couch recuperating.

Today's blog post was going to be about these beautiful tables...

IMG_0016

But alas this flu got the better of me and I have had to put that project on hold. I'll be back on Monday!

But one last thing- you might remember that my baby bro came home a few months ago to visit. He's the one in the middle showing snowboarding videos to my Nanny and my uncle.

IMG_9377

Well, today he is one year older.

HAPPY BIRTHDAY Kristopher!

I hope that it's filled with fresh powder (that's SNOW to all of you who aren't in the know) & a beautiful day on the slopes of Whistler, B.C. We'll be thinking of you. Love you buddy!

Have a wonderful weekend!

xoxo
K

Friday, March 23, 2012

5 For Friday

1. I tried Hot Yoga at a new place in town called Moksha this week. If you are local you might want to give it a try. Be prepared to sweat though. Now, I've done Hot Yoga a bunch of times before and honestly, I always forget how much I dislike the sweaty part of it. Yeah, it's nice to see your work pay off in little rivets and beads of sweat but at the same time it's just uncomfortable to be that sweaty. I'm a girl who likes a breeze when she works out-hence the running. Anyways, yoga's good for your legs if you do run so once in a blue moon it won't kill me to 'yoga-stretch' them out.

2. I've been eying Geralyn Sy's work for Studio Calico for some time now and she announced last night that she is opening a little online shop with downloadable journaling cards. They are super cute. You can catch a sneak here. You bet I'll be getting those for my Project Life album.

3. I have my new DIY piece all picked out and I even have a tutorial to follow courtesy of Centsational Girl. Now, I just need time to get it done. Might be the weekend. Check out the before and come back for more details tomorrow on 'DIY Design Saturday'.

IMG_0016

4. My friend Sara got her first layout picked up for Northridge Publishing yesterday. She has some wonderful style and that girl can work the Tim Holtz products like nobody's business. Check out her blog!

5. We are going to a local production of 'GodSpell' tonight. My BIL is playing a major role in it as well as having choreographed the WHOLE thing. It's playing all weekend so if you are local you should also try and get out and see it. It's playing at the Gower Street Church.

It's Friday. I'm looking forward to sleeping in & doing a little shopping tomorrow. Maybe refinish some furniture or pick up paint for the dining room. What are you plans for the weekend?! Anything Exciting?

xoxo
K

Thursday, March 22, 2012

Thursday?! Seriously?!

IMG_9972

Note: This picture has nothing to do with today's post. I just hate blog posts without pics and I just love cookie dough. This pic was taken on Sunday when I made some chocolate chip cookies for Sunday desert.

I feel like it should be Friday folks. It's been a long week and the lyrics 'she works hard for the money' comes to mind and basically summarizes the last four days.

You see, I'm a substitute teacher which generally means I usually have some time on my hands during the weekdays. Sometimes I love this and sometimes I hate this. But, this week I am working full time-all week. I LOVE it but It's very busy! I'm very thankful for having a classroom for a whole week. In fact, it makes for some awesome stories as well! The crew I have are a handful to say the least and they are keeping me on my toes.

As a result, I was unable to get home in time to photograph any layouts and there's nothing worse than bad lighting when taking a pic of a scrapbooking layout.

So today you are getting some links to a few of my favorite internet finds this week-consider kind of a bonus '5 for Friday'!

1. If you are looking for something funny to read Sydney from 'The Daybook' usually posts an 'Awkward & Awesome Thursday' post that I literally cringe & loud out loud when I read.

2. October Afternoon posted an awesome easy tutorial on using string & mist for layouts. A great idea and super simple!

3. I found a new design website that I love. 6th Street Design School is super cute and she has really nice, colorful taste. Check her out here.

K. That's all you get today. Some days are just lame. Come back tomorrow for a true '5 for Friday'. I'll have something scrappy to share then-promise!

xoxo
K

Wednesday, March 21, 2012

A LIttle Weekday Adventure

Today's layout is brought to you by the kitchen window.

IMG_0003

It was, thankfully, the only place to get some good lighting yesterday evening. Take a look at this...

IMG_0007

Yeah. That's how I photographed the layout-what you don't know is I propped that guy up against a Gatorade bottle. To get it to 'sit up' and be photographed. The things we do for blogging and scrapbooking.

More Amy Tangerine product in this layout from the 'Handmade kit' from Studio Calico. More of those beautiful Thickers with the most perfect grid and those cute little leaves! Honestly, I had no idea what to do with that die cut paper by Studio Calico but then I pulled out my cardstock and thought 'Why not just stick it on top of one of them?" and so I did. And it worked out well.

IMG_0004

This layout is just even and symmetrical. I added some journaling on the little tabbed 'notes' piece behind the collage. I love hidden journaling and the story behind these pictures was a little more personal so I didn't want everyone to be able to read it.

IMG_0006

You may be wondering about the photos themselves. I used the Pioneer Woman's 'vintage' action in PSE 8 to get that cool 70's vibe in the pics. Love that action. They are free if you want to add a few to your Photoshop Program.

It's hump day and we're halfway through the week. I'm working all week this week and I had forgotten what it's like to teach all day every day. I'm exhausted and the kids I'm working with are giving me a run for my money! But, it's good to be in the classroom!

Happy hump day!

xoxo
K

Tuesday, March 20, 2012

Project Life: Collages

So you may have read my '5 for Friday' last week where I talked about this cool instagram collage that 'Just About Everything' posted on her blog with a little tutorial. It's worth checking out if you instagram!

I loved the look and wanted to replicate something similar for my Project Life album.

Here's what I came up with while cropping with the girls on Friday night:

January

IMG_9975

February

IMG_9976

I had the pictures printed on an 8 by 10 photo print from my local developer and then cropped it to fit my paper nicely. I ended up going with an 8.5 by 12 page rather than 8.5 by 11. That extra inch really made a difference in the space for my titles at the top.

I've given some thought to what kind of page protector I want to put it in and I think I'm going to use a 12 by 12 protector and then just sew down the side of it and add some 'highlight' notes to a piece of cardstock to add to the other section.

Here's what it looks like-sorry the pic isn't great-in the page protector.

IMG_9979

I was a much busier 'instagramer' in February than January-I actually had to cut down a few pics in order to fit in this many! Turns out I LOVE instagram according to my iphoto program! But, really this kind of collage is a great way to see your 'month at a glance'.

Still not sure what I'm putting on the other side of these collage page protectors! I'm thinking something very simple but I'm up to hearing suggestions?! What would you put in that little section to the right?! Or would you move the layout to the left and use that side?! decisions, decisions!

Have a great day!

xoxo
K

Monday, March 19, 2012

Inspired by...

We had a really great weekend around here.

Friday night I scrapbooked with some great friends and had a blast. Saturday we went for a monster walk around town followed by a night out to a hockey game- in a booth no less- and then today we had a killer long, long run. It was a great weekend by all accounts.

Just a short post today with a layout I made on Friday night. Truthfully, the rest are waiting for journaling to be printed from my ink-less printer. Gotta get on that this evening!

You might have seen a peek of the beginnings of this layout on my blog on Friday.

IMG_9901

I've been wanting to try a grid with some twine on a piece of cardstock as my base for pictures for ages. Similar to this Amy Tangerine layout. I had the grid made, it just needed some pictures and a little misting love.

So, I used this layout for some beautiful pictures taken by the talented Jeremy Clay from Toronto who took our friends wedding snapshots for them.

IMG_9977

Most of the products here are Amy Tangerine for American Crafts with a little cardstock thrown in for good measure. I loved those leaves that came with the Handmade Studio Calico kit and the pink one was just perfect for the colours in this layout. I also finally caved and used those grey Amy Tangerine AC thickers that I love so much. They are the perfect grey grid! I also used a little Amy Tangerine sticker flower. A few other bits and bobs were added from the kit and then a few brads, buttons and rub-on's from my stash.

I love using quotes on layouts and these pictures were perfect for this quote- "Friends are people who know you and love you just the same". These are some of our favorite people and they know us well and love us, and we love them, despite our respective 'quirks'.

Have a great Monday!

xoxo
K

Sunday, March 18, 2012

Stylin' Sunday

I have a blog crush on Linley from Dwelling & Telling. She has awesome style and I really enjoy the way she mixes her clothes. Her posts often remind me that I have to wear heels more.

Last year I used a few of her hair tutorials to get some very pretty hair and today I'm sharing a new discovery that I made on one of her blog posts this week.

So she subscribes to Birchbox which is a company that sends you samples of beauty products each month for $10. You get a few supersize samples and a few mini samples of new products each month to try in a cute little box. Unfortunately, they only ship to the US. Lucky you if you're in the US.

So I googled this concept in Canada and found three sites-

1. Luxe Box- cost is $12 a month for 5 samples but their subscription is currently sold out and you have to go on the wait list. But their website is pretty awesome and it sounds like they have had some pretty nice samples in their boxes.

2. Glossybox- cost is $15 a month, 5 products but shipping is included. Supposedly high-end samples are included in this one.

3. Topbox- cost is $10 a month & you get 4 samples and there's free shipping with them as well. This one sends high-end samples as well apparently and there's even a review here.

Frankly, this sounds like a great deal. A little box of surprise goodies showing up at your doorstep each month. I just might try this out and see how it goes. It would also make an awesome gift for any woman or girl in your life!

xoxo
K

Saturday, March 17, 2012

DIY: New Bedside Lamps

I guess I should wish you all a Happy St. Patrick's Day before jumping into today's DIY. While we both have some Irish blood in us and I definitely have the Irish red hair M & I aren't big celebrators of this day. In fact, last year on Paddy's Day we hid away in our hotel while everyone was celebrating in Portland, Maine on our road trip up the coast during March break. I suspect we will be just as lame this evening. But either way-happy St. Paddy's day! Whatever your plans, enjoy them!

Now onto a little DIY.

Anyone who knows me knows that I love lamps. I love the way they can really change a room. This was my first DIY discovery with some lamp bases that I thrifted.

IMG_9951

Aren't they awesome? So retro and clean-a little chevron doesn't hurt either. I was originally going to spray paint this lamp but changed my mind after seeing them with these awesome gray linen lampshades that I picked up.

So this week I picked up a couple of gold, beautifully tacky lamps from a thrift store.

IMG_9916

For the rock bottom price of $10-total-these babies came home with me. I liked their shape and the height and they are nice and heavy too so they are good lamps but they just needed a little TLC.

I also needed lampshades and I was going for something a little 'different'. I had my hands on some nice taupe shades at Homesense when M spotted these white puppies in this lovely square-ish shape. Very different but plain.

IMG_9918

It started out looking like this-

IMG_9920

So here's what I did with it all.

You will need a few basic supplies: spray paint- I like Krylon-, a roll of painters tape, some grocery bags, wet wipes and a face mask.

IMG_9925

First I made sure they both worked when I got them home. This is key. They did. So I took them down to my 'workspace' a.k.a the basement in all it's murky glory. I taped them up with some grocery bags to cover the parts that weren't being painted.

IMG_9926

I gave them a quick wipe with a wet wipe and wiped them down to dry with a rag to eliminate any dust.Then I used Krylon spray paint in black matte and sprayed them both down. It only
takes 10 minutes for the paint to dry and I gave them a second coat as well about 20 minutes later.

IMG_9927

And that was the base.

Then I proceeded to dress up the lampshade a little with some ribbon that I had in my stash that matches a little bit of blue from our duvet cover.

IMG_9931

So with a few glue dots I positioned the ribbon around the base and the top of the lampshades.

IMG_9933

I took off all the tape and bags, added the lightbulbs and topped the lamps with their shades. Done.

IMG_9943

This was the lamp that was on our bedside tables before.

IMG_9945

They were small and although the shade matched the bed clothes, the style of them didn't suit the look we were going for in the room.

And now the bedside table looks like this.

IMG_9946

I like the height of the lamps. They are big and chunky. They also give off some great light because of the white shades.

And that's this weeks DIY. Try a little lamp project-they are cheap and easy to do and a great way to make a room your own space.

Also, as a side note, I would love to try something like this. I'm perpetually on the hunt for new furniture for the little spots in our house and this is something I would love to try on a piece. We'll see.

xoxo
K

Friday, March 16, 2012

5 For Friday

There's been a lot of interesting things come up this week in the bloggisphere and I have a list choc full of scrappy busniess I wanted to try:

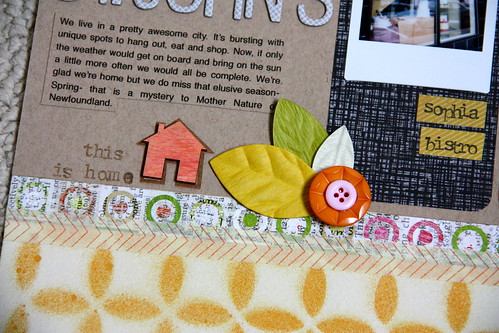
1. Studio Calico had this 
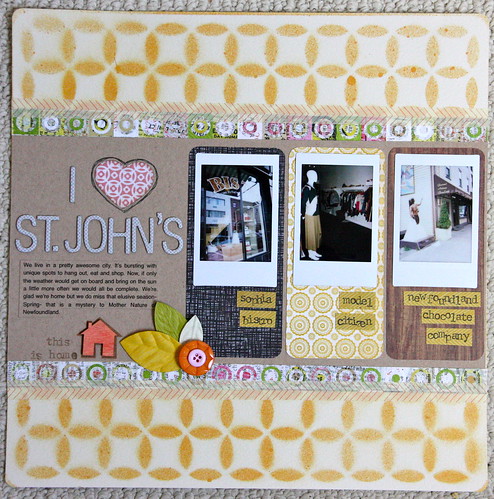
awesome challenge this week celebrating Dr. Seuss-his birthday wasn't too long ago- in honor of The Lorax which came out last week. I used this as an opportunity to try a new challenge for a Simple Scrapper assignment.

The April assignment at Simple Scrapper was to try and make a layout without using any embellishments-try that one out because it is difficult! Here's what I came up with-

IMG_9942

I wanted something with a long title to fill the page. I just did a little sewing around the page and stamping with some cardstock and a little mist. A few punched cardstock pieces might have been 'cheating' but it was the best I could do!

2. Early in the week Cathy Zielske's had an awesome promt/layout on her blog inspired by a newspaper article she saw where she scrapbooked 'The 5 Faces of Me'. She did each of her faces in each generation but frankly I think I could definitely come up with '5 Faces' from teendom to now. Def going to get on this idea-love all that journaling too!

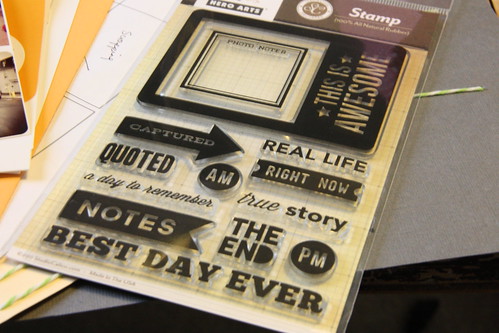
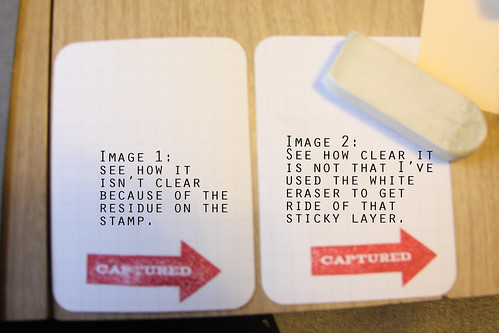
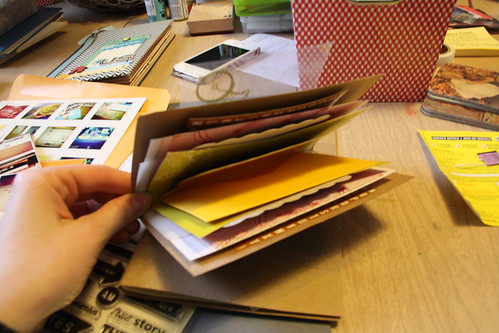
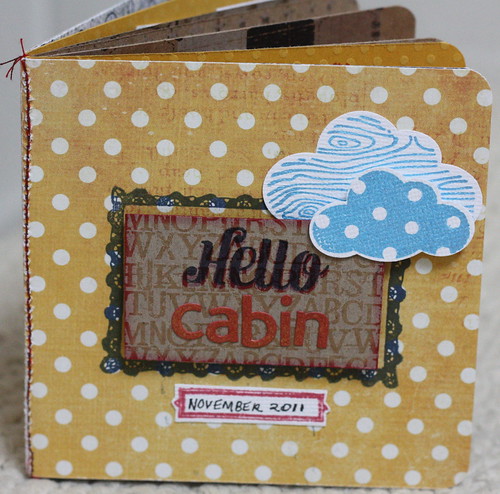
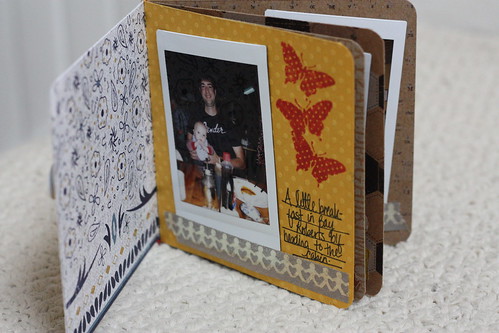
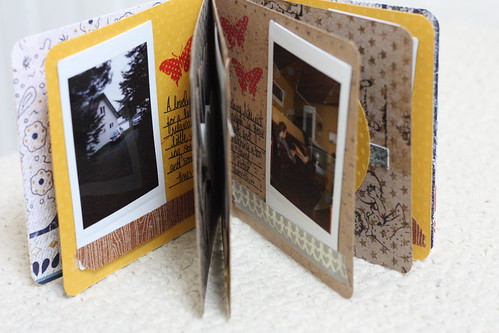
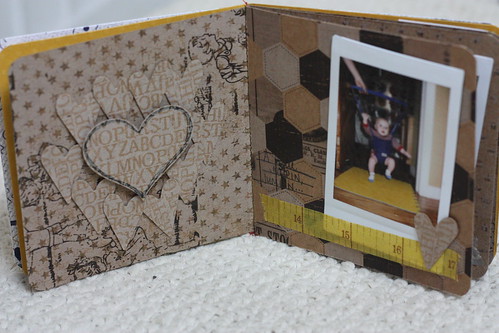
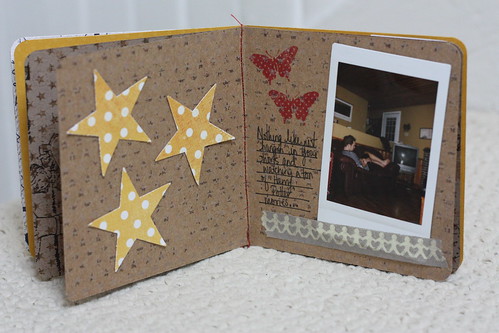
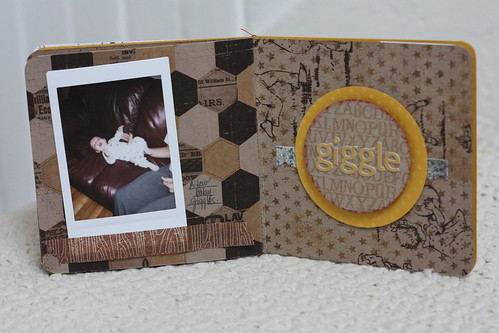
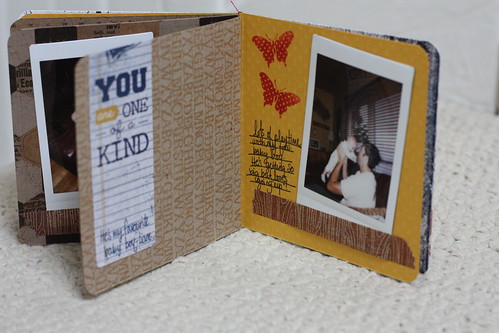
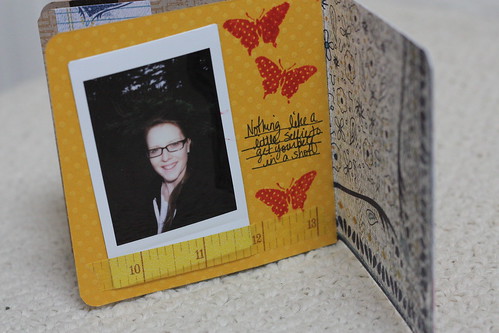
3. There was a really cool tutorial on the Crate Paper blog about using book binding adhesive for a mini-album. I liked the tutorial but what I liked even more was the fake Polaroid pictures that she used for the album itself. Awesome. I am just recently discovering an easy way I can do this in Picassa. Going to try that. I'll post a little tutorial once I've tried it out myself!
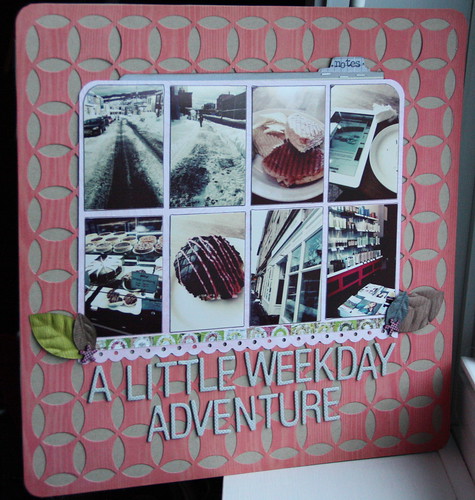
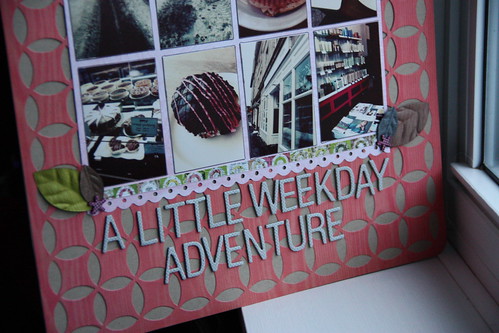
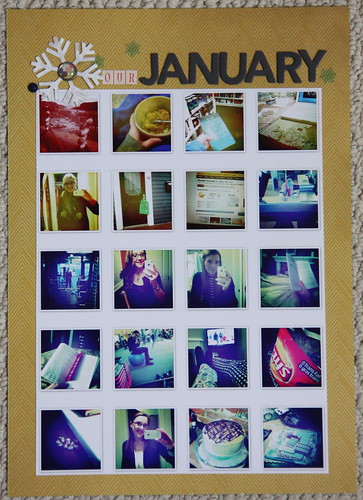
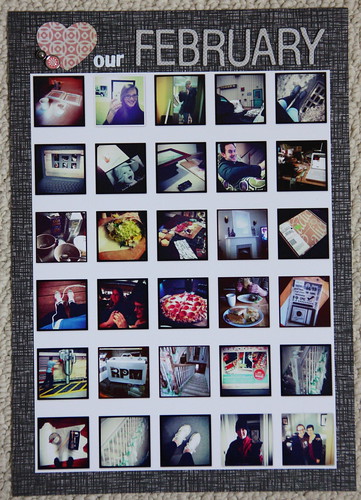
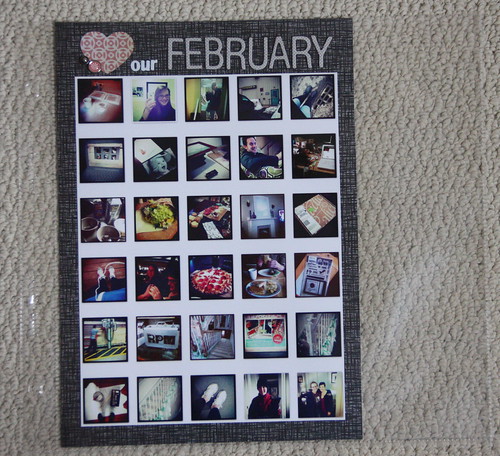
4. This instagram collage which I found on Pinterest by 'Just About Everything' inspired me to make my own layout for January & February. I plan to add them to my Project Life album! I've got the 8 by 10 pics printed now I just have to find the time to put the layouts together.

5. Found this tutorial on Pinterest to make your own envelope-those kind that you tie string around the circle. So cool- a great way to include some personal journaling in a PL album or something to add to my 'Happy Little Moments' book. I also found a cool tutorial on 'Cup of Tea', a style blog I discovered via Lauren Conrad. That's random, I know. But the tutorial teaches you how to make an envelope with a doily. Very pretty and feminine.

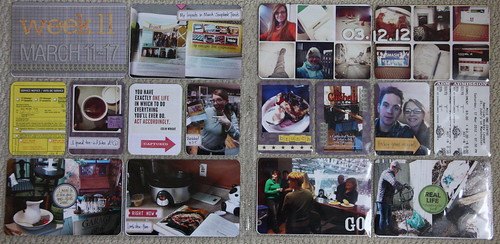
Speaking of Project Life I've got week 10 to share today as an added bonus.

This week I started using 1/4" corners which I really, really like a lot more. I didn't include any ephemera but I have saved some for next week. I also wanted to use some of the journaling cards that I've collected via pdf's that have been all over the internet for PL but our printer ran out of ink so alas that did not happen. Goals for next week right?!

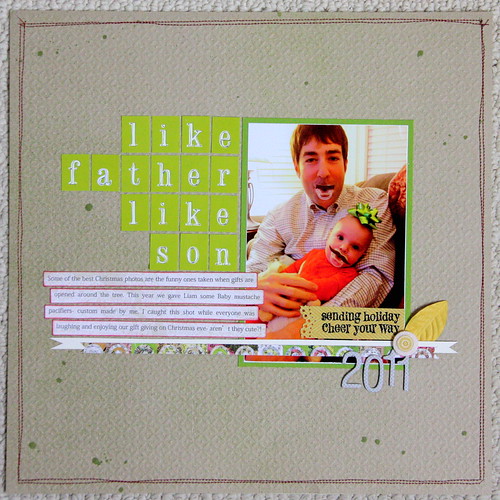
So here's the full week layout.

IMG_9936

Went with a yellow & green theme this week with a few neutrals thrown in for good measure. Used a few PL stamps from SC as well. Had to write all my journaling because, like I said, the printer needs ink.

IMG_9937

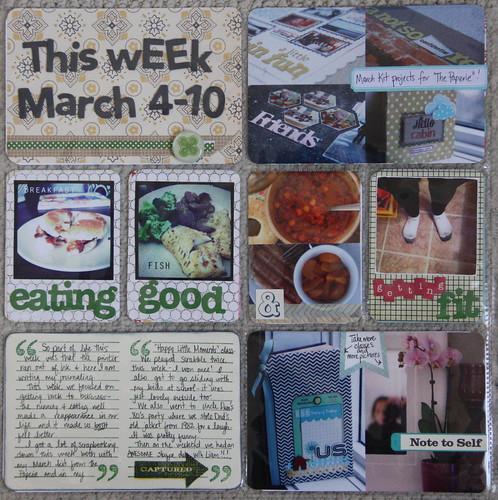
This week we got back down to business eating right and running. Which made for a busy week. I got lots of scrapbooking done-some assignments for the March kit at 'The Paperie' and I started my 'Happy Little Moments' class with Maggie Holmes.

IMG_9938

We played Scrabble this week two nights and I actually won one evening! That never happens. I went sliding too with school and my uncle turned 50, celebrating in style with a throwback to the 80's. M & I were pretty sneaky and waited for my parents to leave their house and then we snuck in and stole my Dad's old softball jacket-dated 1982. My Dad got a pretty good laugh out of that! And then we ended our weekend with a skype date with Allison, Paul & Liam. It was so nice to see him even if I couldn't snuggle him. 3 more weeks to our visit to O-town! We can't wait!

IMG_9940

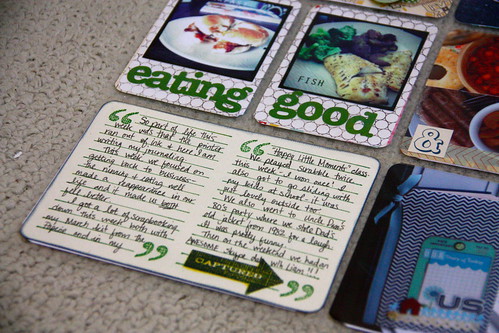
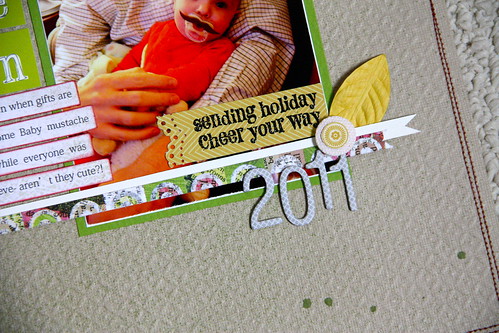
Had to hand write my journaling today because the printer was out of ink so I just stamped a journaling stamp twice and use it for my lines.

IMG_9939

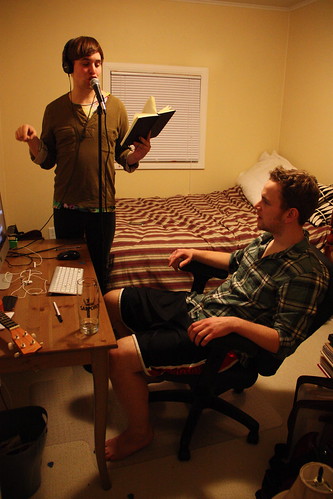
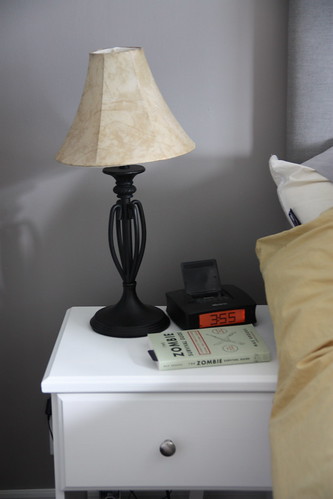
And a close up of my favorite pic to the week-also screen capture shots are awesome.

That's it for me. Scrapbooking tonight with the girls at 
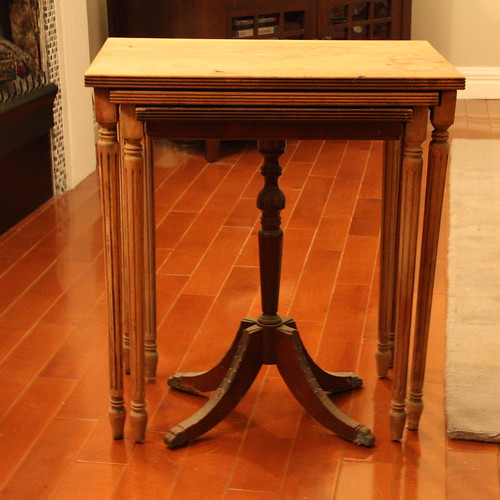
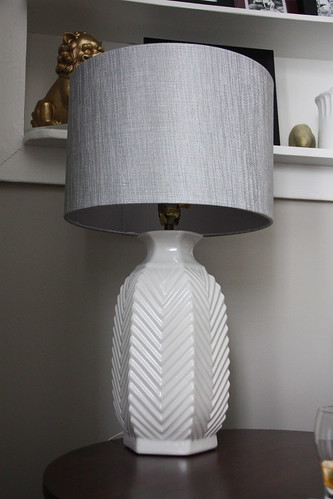
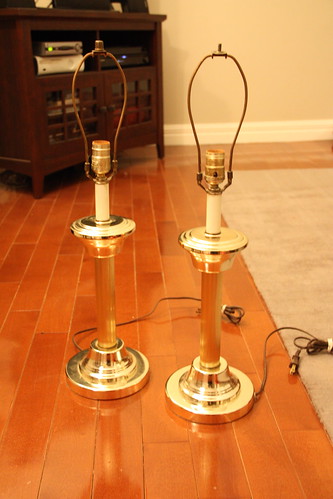
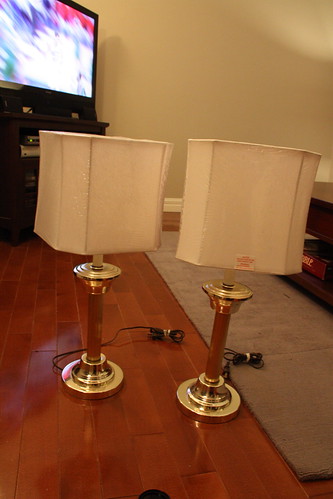
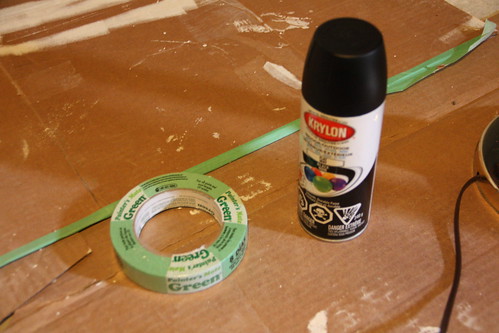
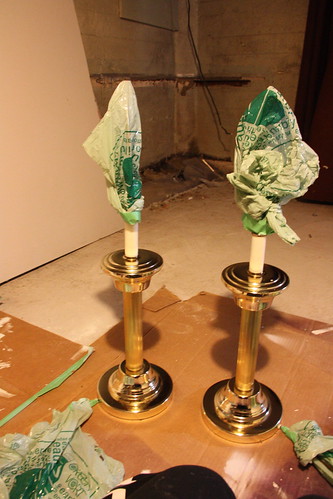
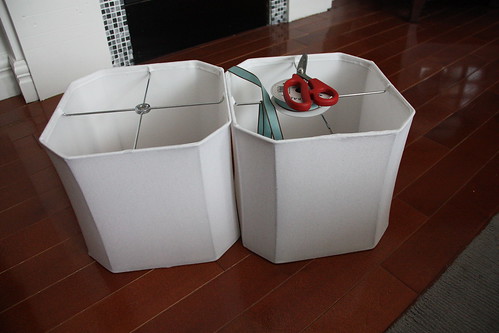
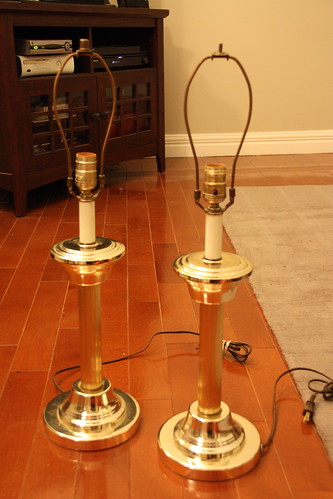
the store and I can't wait. Have a wonderful weekend and if you want a little DIY tutorial come check out the blog tomorrow. I'll be posting my new lamp reveal!

xoxo
K

Thursday, March 15, 2012

Thursday Randomness

I've got a whole shambles of scatterbrained-ness on my blog today. It's been a busy week around here and I've only attempted a few things at my scrapbooking table in passing. Usually I have a little bit of time to sit down and work on some things-especially Project Life-but it all had to wait until late this afternoon.

We've started running and going to the gym more around here too-gearing up for the running seasoning beginning the first weekend of April-and that takes considerable time as well.

Here's some randomness to suit my mood this week.

Random Picture #1:
Here's the mess that greeted me when I walked into my scrapbooking room.

IMG_9901

Random Picture #2:
My Studio Calico box came yesterday. In fact, I rushed home on lunch break to see if it was here. I have the most awesome UPS guy around-he drops my SC box on the back deck if there's nobody here. I'm thinking that my next delivery day I may just leave him some treats-kind of a tradeoff to tell him I heart him.

IMG_9908

He brought these lovely stamps I managed to snag in the mayhem at SC this past reveal day! Pumped to use those in my PL.

Random Picture #3:
So while checking out the message baord last night I discovered something awesome. You probably already know this if you are a frequent stamper but if not-this tip will change your life. Apparently, if you use a white eraser on your new acrylic stamps they will come out sharp like never before. I had no idea this was possible and I'm always disappointed when I break out a new stamp and the image isn't clear. Now I know why. There's a residue there that you can get rid of just by erasing with the art eraser. Check this out...

IMG_9913

The difference is awesome. Especially with bigger stamps.

Random Picture #4:

IMG_9910

I am sooo excited to be announcing my first class at 'The Paperie'. The class went 'live' the other day and I can't wait to be in the scrapbooking classroom again. It's an awesome kids/teens class where we'll be creating our own Smashbooks a la Amy Tangerine. Taking a note from her awesome little mini album from her previous line we're going to create our own little book to fill with some cool techniques and pics of our friends, family, whatever. I'm so excited. It's also a full day of crafting so it's a great opportunity to spend the day crafting somewhere special while mom and dad are at work! It's during Easter break here on Thursday, April 12th. Check out the link here and if you're local tell everyone you know! The more the merrier!

Random Picture #5:
I've begun a new feature here on the blog called DIY Design. It's a special Saturday posting where I share something special that I've DIY'ed. Here's a sneak peak of this week's project.

IMG_9917

Aren't they gold and tacky. So not my style. Come back Saturday for the big reveal.

Random Picture #6:

And here's s sneak of PL in progress for week 10.

IMG_9915

It's Thursday which means tomorrows Friday and we'll all know I love Friday. I love it even more tomorrow because I'm going scrapping at the store with the girls. Big plans, big plans.

xoxo
K

Wednesday, March 14, 2012

Polaroids & Mini-Albums

Anyone out there love Polaroids? I do. And I have an Instax that I like to pull out every now and again. It's awesome and you can find it here. It's a lot of fun to use but cost effective it is not. It's about $1.00 per photo so you really have to make them worth it.

Now, Amy Tangerine & Kelly Purkey have this do-flicky called a Fugifilm Pivi and that's even cooler. You can make polaroid photos from the pics that you take on your DSLR or other camera-that way you get the shot you want the first time. Unfortunately, with the Instax sometimes you need a few shots to get the one you are looking for!

That being said, it is fun to tinker around with and so when we spent some time at the cabin in November I took it along and got a few shots of the action!

I used 'The Paperie's' March kit to make this little mini-album with the resulting photos.

IMG_9806

The album was quite simple to make. It's 4 sheets of 8" by 4" paper, scored down the middle to make a number of 4" by 4" pages. After scoring each sheet and putting them together the way I wanted I sewed down the spine on both sides to keep the whole thing in tact. Easy. Then I just added photos, a bit of washi tape and a few lines of journaling on each page-just a simple caption.

IMG_9807

IMG_9808

IMG_9809

IMG_9810

IMG_9811

IMG_9812

IMG_9813

IMG_9814

Just a very simple album with a few punched butterflies, hearts and the like here and there. Nothing too exciting but a good way to use up some scraps and get those polaroids scrapbooked.

I also made a few cards out of the pieces that didn't make it into the album.

IMG_9815

Simple and easy-a sentiment on a little piece of cardstock cut out like a little flag piece.

xoxo
K