Today my very good friend Sara is here to give you a little tutorial on mixed media. This girl knows mixed media folks. I can dabble in a little paint here and there but honestly, she knows what she's doing. Check out her classes at The Paperie or her blog at SaraThings for more of her inspiring designs.
Take it away Sara...
When Krista asked me to contribute as a guest blogger this
week I was thrilled.
And then I was worried.
I mean, come on, she’s an awesome scrapbooker, right? So
instead of showing you something that you can get in an awesome form her,
I decided to get messy hands!
I love making home décor – really, it’s one of my favourite
things to do. No stress over what pictures to scrap, no worrying about
timelines or if I have too many LO’s of Molly, my daughter, and not enough of
Gabe, my son- just fun playtime!
I’ve been wanting a new canvas for my front porch and this
seemed like the perfect time to make one! So grab a cup of whatever you fancy
and enjoy the pictures and mini tutorial!
First, I add my base layers with Ranger
Matte Multimedium – usually text or book paper, tissue paper, and doilies.
In this case I was lucky enough to have a dictionary with the word “home” and
tissue paper with antique keys on it – perfect for a home canvas even though you
won’t see much of it once I’m finished - the trials of mixed media layers!
That’s ok though, I just like knowing they’re on there!

Next, I always add a layer of molding paste
through a stencil
. This is a step a lot of people don’t take but I love the dimension and look
it gives the finished product - way more texture and visual interest than just
the paper layer.
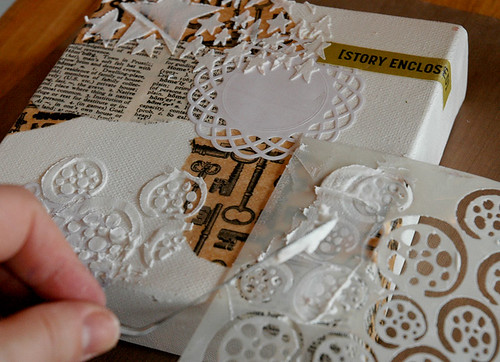
Now comes the waiting game. If you’re totally impatient (and
I normally am) you can carefully heat set it but I find I like the molding
paste better for this type of project when it air dries. Sigh.
So do this step late at night and then go to bed. It will be
ready in the morning and you won’t feel like you’ve waited at all!
Once it’s dry you can paint, mist, ink, whatever – just add
some colour! My favourites lately are the Luminarte
Silks – they’re a waterbased, shimmery glaze, and the colours are
incredible! I usually slap them on randomly but since I kind of knew where I
was going with this canvas the colour placement was a little more deliberate.
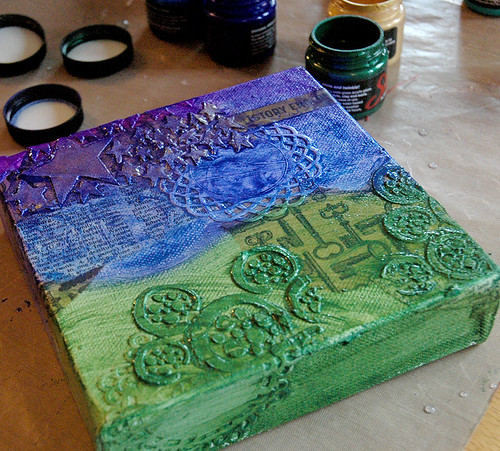
See how the paint picks up the stenciled designs and the
doilies? Sweet!
Next, while you wait for that to dry, you can cut your images
from patterned paper or book text. Don’t be too fussy, this is not a perfect
piece – it’s art! Once you’re happy with the pieces, use the multimedium to
adhere it all to each other and the canvas.
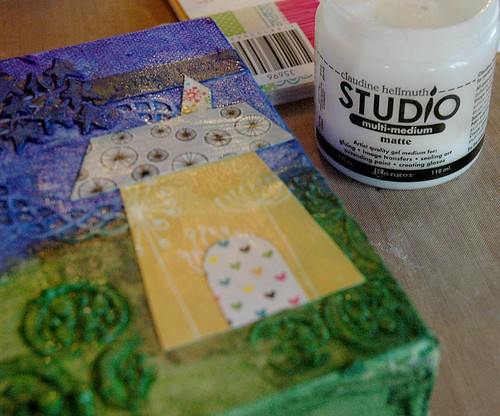
Now this is where we get into the little details!
First, add some shadows – I love my Distress Markers for
this since they blend over the multimedium really well:
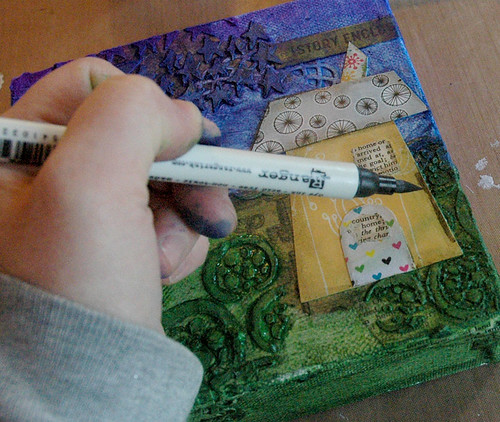
Then some doodling, stamps, and rub-ons for detail and more
texture:
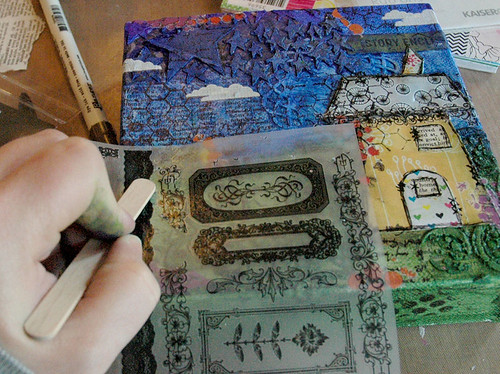
Add some word stickers, some extra embellies if you like:
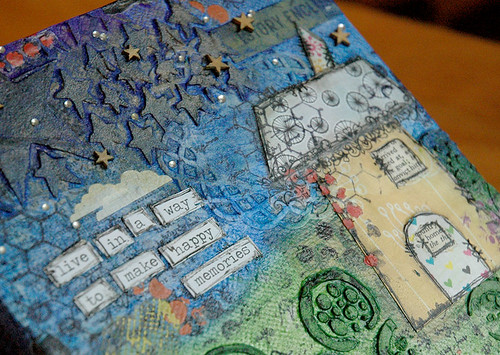
And you’re done!
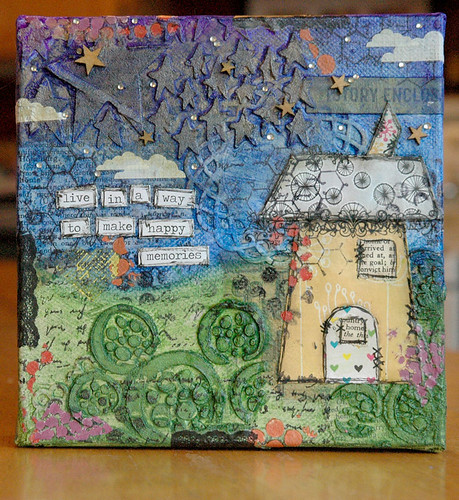
This is a quick (seriously, it took about an hour, tops,
including most of the drying time), easy, and great way to use paper scraps and
all those rub-ons you won’t throw away!
I hope you liked this little break from the norm here on
Krista’s blog – I know I enjoyed showing you some of what I do! You can catch
up with me any time over at my spot in the blogosphere, sarathings, where I do more of what you’ve
just seen, scrapbook LO’s, tutorials, and more. Hope to see some of you there
and who knows, maybe someday I’ll convince Krista to guest blog for me! And big thanks to her
for having me here – it’s been a blast getting painty!
xoxo
S
S

awesome! love this canvas!
ReplyDeleteLove those Silks! May be time to make another colour order :)
ReplyDeletebeautiful canvas and tutorial! Thank you.
ReplyDelete