
Now, great minds must think alike because my friend Sara also happens to be doing a stitching tutorial on her blog today! Check it out here! Also, it's Sara's birthday so you should wish her a happy birthday while you're there!
Happy Birthday friend! I hope it's wonderful!
So, I've been noticing that all kinds of cute Amy Tan tags have been popping up in the gallery on Two Peas and I really wanted to buy one but the shipping costs really deter me- all the way to Canada is expensive! So, I made my own. Here's how:
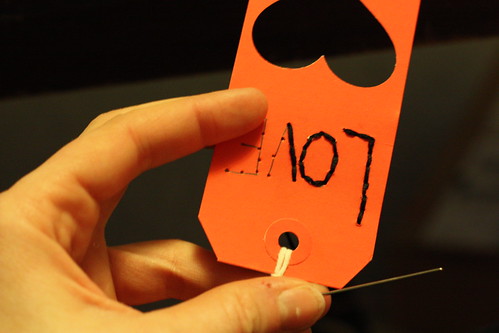
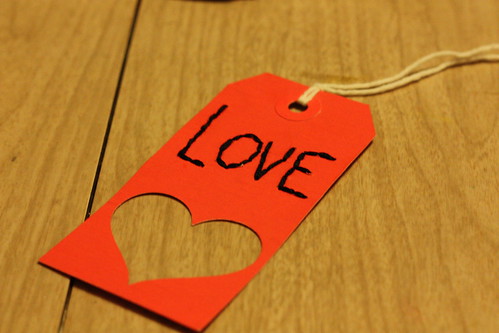
1. Grab a tag and a punch. I chose a red tag and used a Fiskars heart shaped punch. I punched my heart out of the tag.

2. Write your word on your tag using a pencil or a marker.Puncture your letters with a little pin- I used the Bazzil stichin' tool. I love this thing for making holes.

3. Sew your word using some thread.
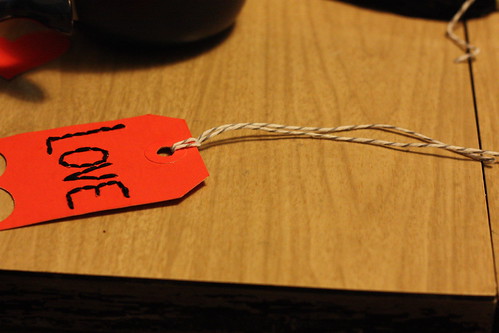
4. I didn't like the string that came with the tag so I switched it out for some grey & white Divine Twine.
6. I decided to add another heart in the punched shape area, popped up with a pop dot, and cover it with some glossy accents to give it that jelly-like feel.
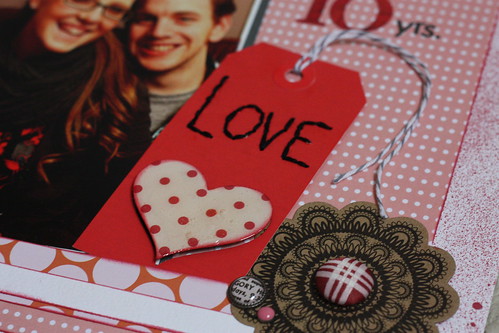
And then I used it on this layout.
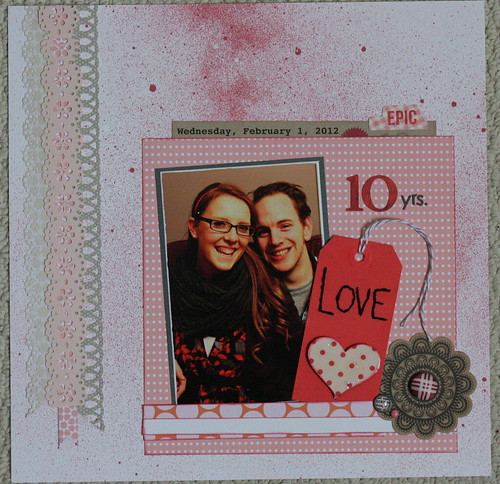
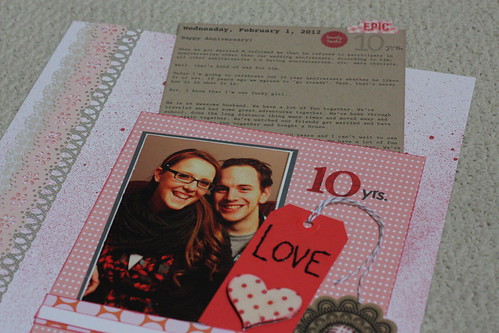
Just something simple. I wanted to make a layout using the journaling from my anniversary post on February 1st. So I did and I added the journaling, tabbed, behind the photo & the tag.
If you like to stitch or sew don't forget to check out Sara's tutorial over on her blog as well!
Happy Tuesday!
xoxo
K
I looove the borders on the left and the huge hidden journaling, awesome!
ReplyDeleteOooooh, thats super cute!! and a sweet photo!
ReplyDeletegreetings from germany :)
lovely layout.
ReplyDeleteso funny that you and Sara did the same technique today. love your tag, too - especially the faux apoxy heart. nice touch.
Love the tag and the lacey borders along the side!
ReplyDeleteSo beautiful - love that you used the tag on a LO and the large hidden journaling is awesome!
ReplyDeleteGreat tutorial! :)
ReplyDeleteLove the tag you've made & the hidden journaling...such an adorable layout!
ReplyDeleteI really like how you did the journaling for this page!
ReplyDeleteLooks great! Love the hidden journaling and the tag- esp the part where it wasn't $4 to buy *LOL*
ReplyDeletelooks great! i love stitching!
ReplyDeleteThis is beautiful!!!!! I love it! Especially the journaling.
ReplyDeleteI love this tag! Great sewing! Love Penny Scrap-aholic@blogspot.com
ReplyDeleteGreat idea!
ReplyDelete