Showing posts with label the Paperie. Show all posts

Tuesday, March 4, 2014

Valentine's for everyone!

Late in January we hosted a great big group of mom's, daughter's, Grandma's & aunties for a Valentine's-making class at The Paperie.

IMG_5365
Screen Shot 2014-01-27 at 9.14.13 PM

It was so popular we had to host a second class! 

Well, Valentine's is long over but it's never to late to make something cute for someone you love, so I thought I'd share some pics of what we made- 6 of each card, making a total of 30 Valentine's for each person's classmates + friends + family. Pretty cool huh?! 

IMG_0552

We did a little embossing, stamping, masking, misting, and punching among other things. It was a great class! It was so great we're going to do an Easter one just like it.

I've been working on some samples- here's a peek!

IMG_5664 IMG_5663

If you're local drop us a line at The Paperie to sign up for this hoppy class! It runs on Sunday, March 23 from 1-4 p.m.

xoxo
K

Friday, November 22, 2013

5 For Friday


bellagio
*The fountains at The Bellagio. 

1. We just returned from Vegas early this week-more on that soon- & I'm reliving it all by watching Ocean's 11. Love. The Hangover might be next in the line-up.

2. It's hard to believe but Christmas is upon us! I, for one, am pumped! Tonight we're holding a Parent Survival Night at The Paperie from 6-9 for anyone who wants some entertaining babysitters-complete with a pizza dinner & some handmade cool cards! Call the store to sign up or check it out!

Screen shot 2013-11-20 at 9.28.54 PM

3. Write. Click. Scrapbook. is doing a 'Documenting Your December' on their blog this week which is worth a look if you're working on a December Daily for the holidays. There's some excellent information in there.

4. Elsie & Emma from A Beautiful Mess can truly do no wrong! Check out what they did to their Laundry machines to jazz them up. Seriously?! Where do they come up with it all?! Love. It. So, that just got added to my 'lanudry list' ;) of things to-do around the house.

5. I've been reading voraciously this Fall and have a number of books to share with you. Be on the look out for that post next week! Right now I'm reading 'Crazy Rish Asians', recommended by a friend. It's very good so far.

Have a happy weekend! We stickin' around home for the first time in two weekends and I for one am pumped to clean the house (weirdo aren't I?!) and laze around with my fur-baby and husband.

xoxo
K

Monday, October 21, 2013

Week In The Life: The Album

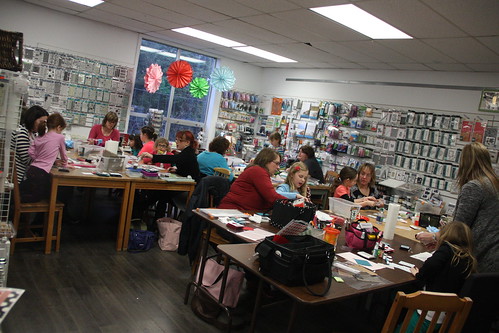
The Paperie took part in Ali Edwards' Week in The Life as a community this year and if you were involved you may have joined us on September 28th for a day-long crop to complete your album. I hope that the week-long workshop was a good one and that you've been able to complete your album. If not, there's always time at the upcoming Fall retreat next month.

Mine is finished and I thought I would share it today.

I kept it simple. I stuck with a formula which made it easy for me to complete it all in a timely manner.

So here's how it shaped up-

IMG_4496

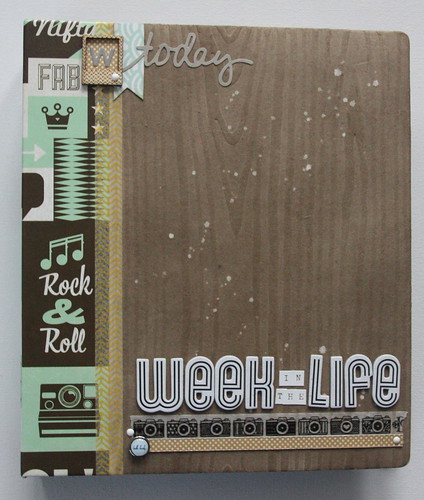
I used a Basic Grey album for this project. Specifically the Hipster line. I liked the wood grain chipboard album that it came in but jazzed it up with some ink and a few Mr. Huey white tap-tap-taps of speckled mister.

IMG_4497

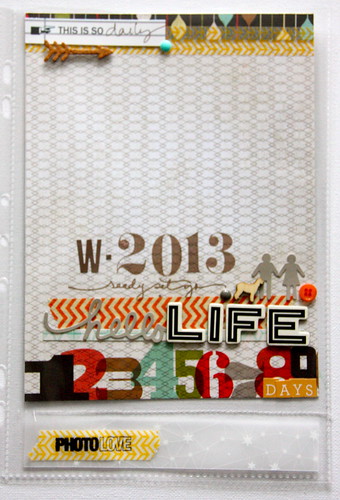
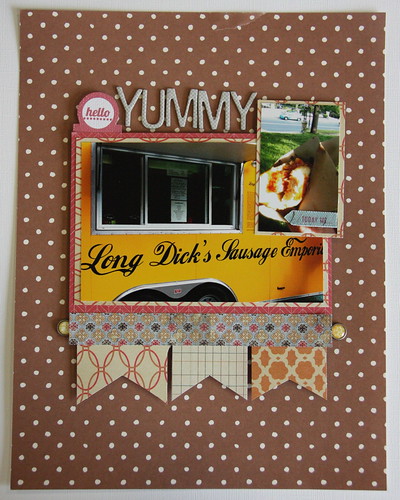
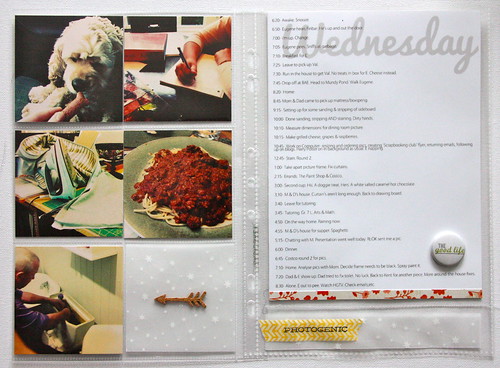
My opening page is a trimmed page that came with the album. I liked the numbers at the bottom and used the '7' to identify my days. I also love and adore those Avery Elle number stamps that I used for the '2013'. They are available at The Paperie if you'd like to pick up a set. They are the bomb.

IMG_4498

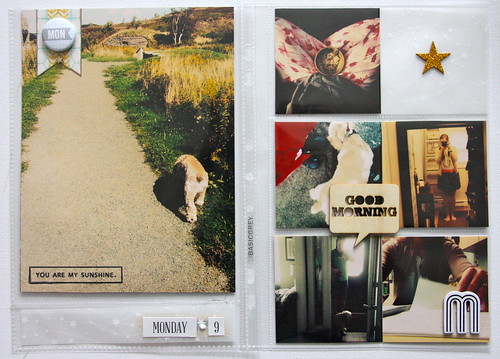
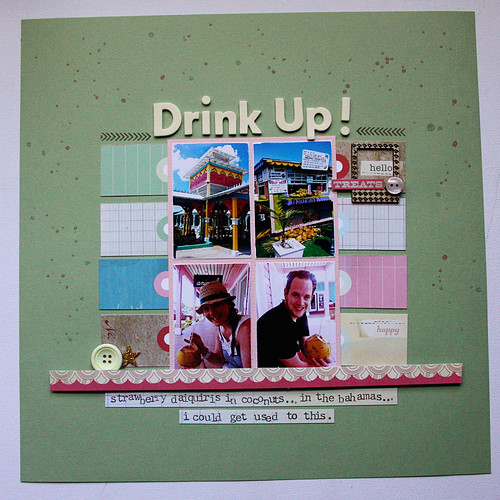
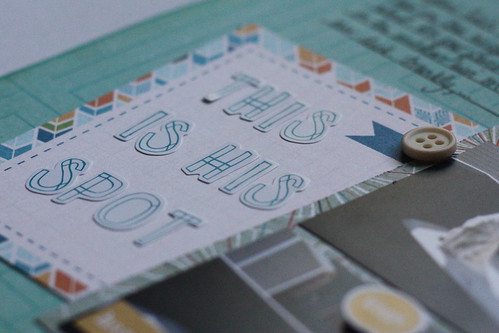
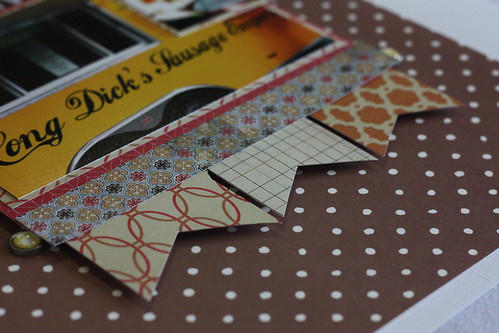
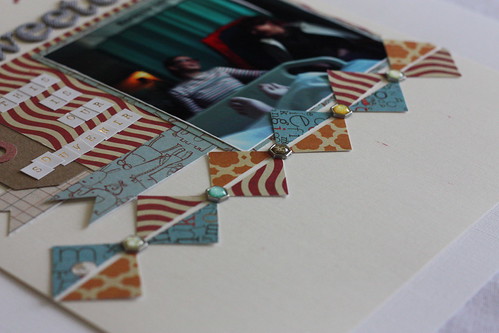
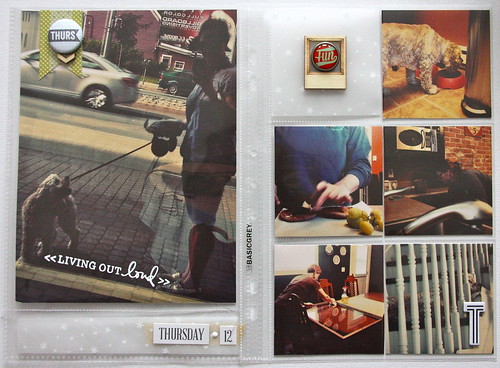
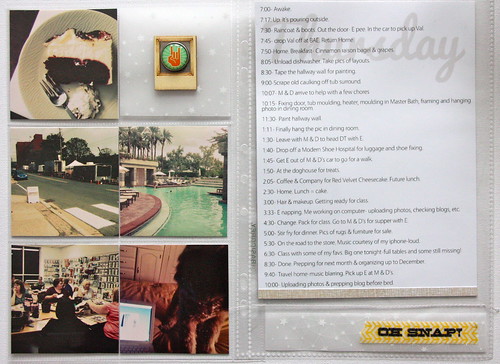
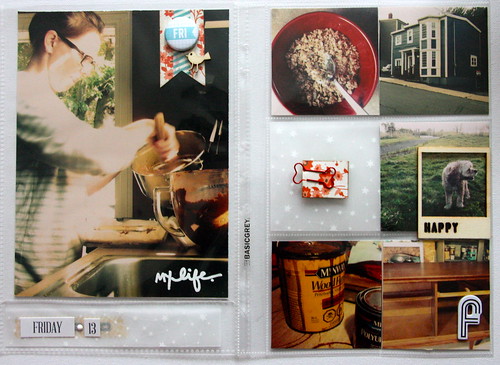
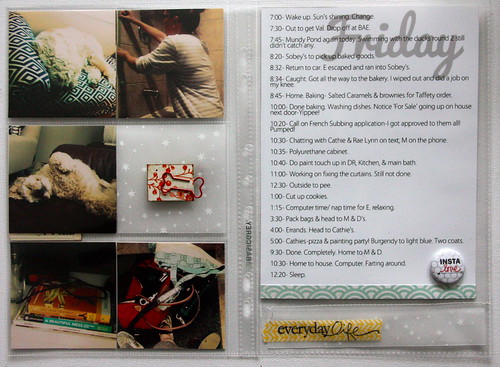
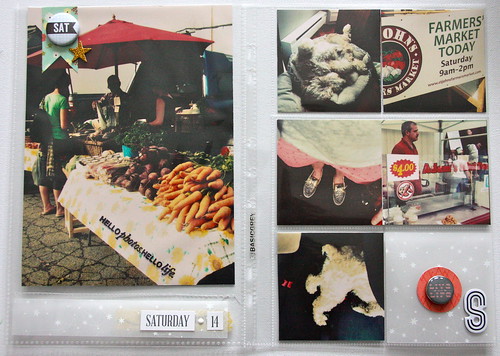
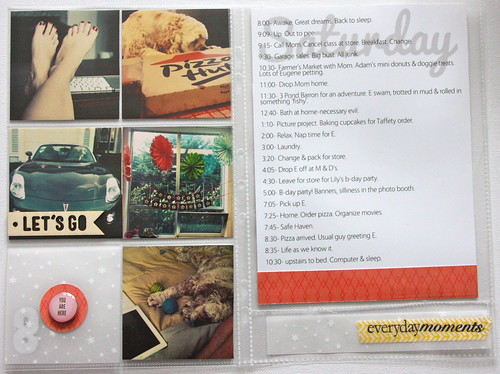
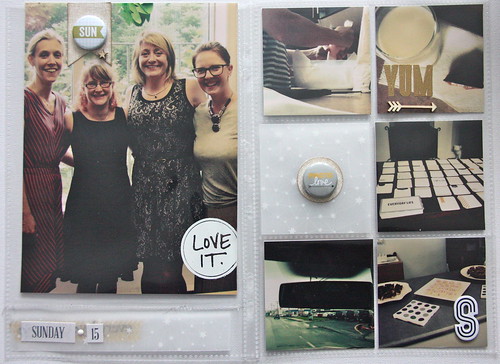
My formula included a large 6 by 8 photo but I had a dilemma- the page protectors for said photo are obviously much larger. Yes, those photos are 6 by 8. So I added a 1" piece of vellum at the bottom of each of the full page protectors and sewed it into the page protector with white twine. I added the day and date as well to each vellum piece, sticking it on the outside of the page protector. I also added a flag and a badge to each main photo.

IMG_4499

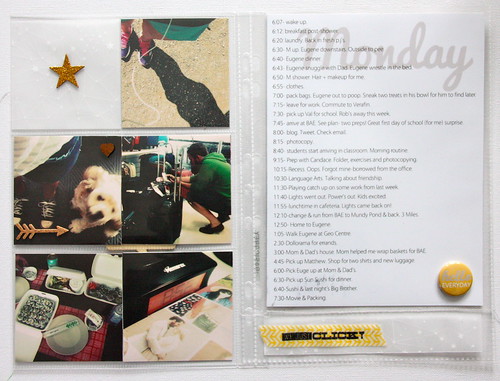
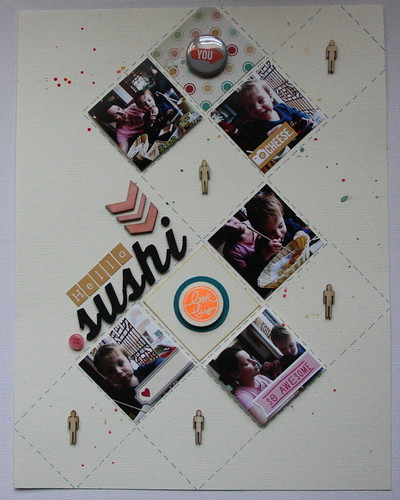
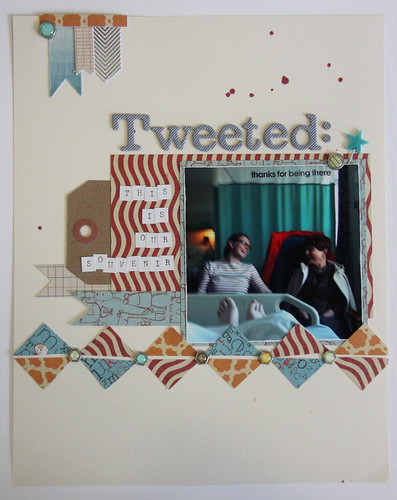
The next page was a combination of instagram photos. and one pocket included more of that SC vellum that I love dearly, topped with a little embellishment. For my notes page I took the info that I typed up on my phone each day using the Evernote app and put them in a 6 by 8 document in photoshop and just added a brush, minimizing the opacity. I added a badge to that too and of course the vellum is at the bottom of that page as well.

IMG_4501

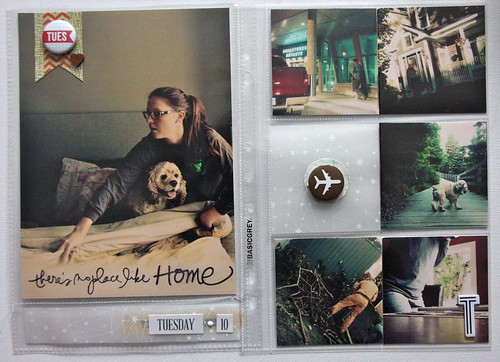
Each day I tried to take some selfie shots with both my DSLR & the timercam app on my phone. They were life saving since M was out of town from Tuesday onwards throughout the week.

IMG_4502

I love that I got some shots of my parents in this week's project. I spent a lot of time there while M was away.

IMG_4503

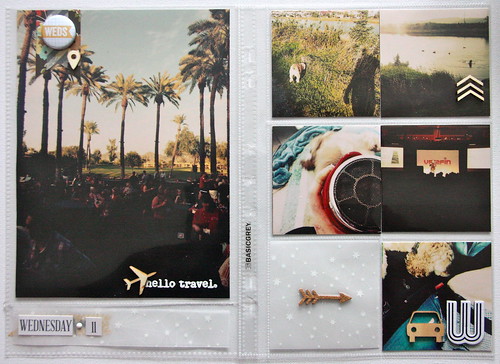
I also have the greatest husband ever because he sent me shots of his work trip to include in my project. He's pretty much the best.

IMG_4504

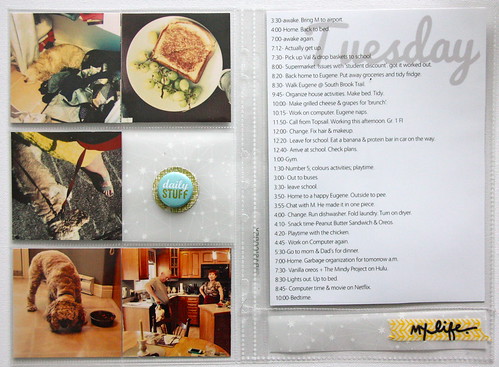
Because I had some white space at the bottom of each of my weekdays-due to not taking notes as diligently as the week went on-I added some pattern paper from the pp that came with the binder album. This way it all coordinates with the look I was aiming for.

IMG_4505

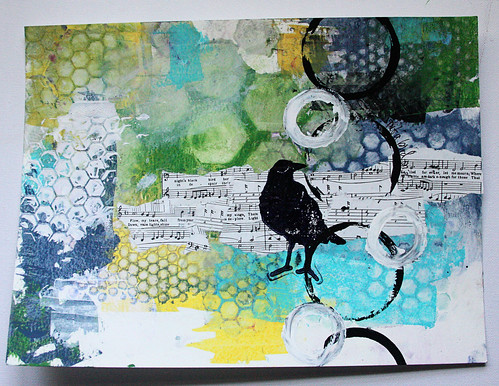
Another repeated element that I discovered I loved was stamping a sentiment- and sometimes embossing- on the large photo. This is one of my favs for the week-I love a good reflection photo.

IMG_4506

It was also fun finding little embellishments to go on each vellum piece. It was like a little treasure hunt through some of my fav things for each page.

IMG_4507

Yes. That is me with my tongue stuck out-like a 3 year old- concentrating on keeping the caramel in the dish for Taffety cookies I made that morning.

IMG_4508

My dog likes to sleep. Have you noticed?

IMG_4509

Something else that I did to create a sense of cohesiveness in this album was use the same tones in my photos. I used some retouching edits by Pioneer Woman for them and love how they turned out.

IMG_4510

Here and there I also added a few embellishments to the little instagram pics as well like the 'Let's Go' wood veneer.

IMG_4511

I also added the initial for each day of the bottom right hand corner instagram photo on each page as well. Those letters are so cool.

IMG_4512

Can you tell that as the week went on my journaling became a little lax? Lol.

IMG_4513

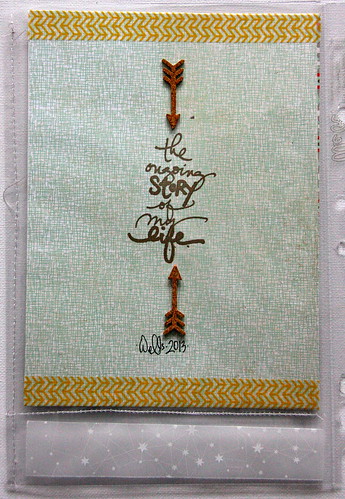
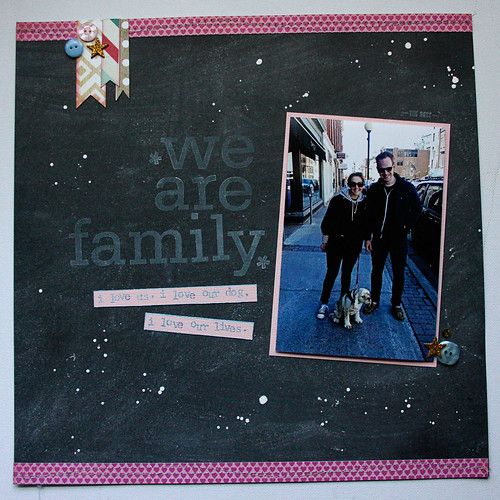
And that's where it ended-on a little quote by Ali Edwards using some Technique Tuesday stamps & a few cork arrows from SC.

I loved this project. I will def do it again. I'm not sure I'd use another BG album though. I was disappointed with the page protectors. The ones that came with the album were cheap and flimsy. However, the ones I bought in a separate package were of much thicker, better quality. Strange. The other thing that bothered me was that the large page protector were huge-not even remotely close to 6 by 8 and it can be difficult to find a printer that prints much bigger than that without a lot of tinkering and fooling around.

So there you have it. Week in the Life for Fall 2013. Did you do a WITL album this year? I'd love to see it-leave me a link in the comments if it's online!

xoxo
K


Sunday, October 20, 2013

Saturday DIY: Powder Room Overhaul

I have sneaks.

I'm working on a massive project. An overhaul of a space some of you may know well.

Let's just say it started out like this.

IMG_9387

Ick. An ugly green color for the walls and that gross black vinal baseboard found in office buildings. Not to mention the black door and a black heater. Ick. Not homey or pretty at all.

So after some deliberation, and a little panic at my idea for a focal wall, it now looks kind of like this.

IMG_9435

And they love it. If you are local this happens to be The Paperie's current bathroom. It's not even close to be done. But, it's getting there. Ignore the ceiling-it's getting painted and a new fixture. Not to mention that vent that shall be getting a coat of spray paint to blend into the rest of the room.

I'm pretty excited about it so I wanted to share a little of it here on the blog.

Stay tuned for more projects I'm working on for this room soon!

xoxo
K

Thursday, September 5, 2013

September Kit Layouts: Part 2

For part one, see yesterday's post.

More layouts today using The Paperie's design team September kit.

IMG_4048

Continuing the trend of trying to incorporate an 8 1/2 by 11 page into my pages each month, I created the above page this time around. I tried something a little different though. I chopped part of the pattern paper off and added three little pockets from a divided page protector-something I've seen Ali Edwards do in a page once. I LOVE the look.

So I added some pictures and sequins to the pockets and a little sub-title to the middle pocket with a gold star. Above I added a whole bunch of photos. That's a lot of photos on- 6 to be exact- on a smaller page. This might have been my favorite page- and not just because of the subject matter! This won't be the last time I sew a divided page protector to a layout!

IMG_4045

And I had one more piece of cardstock left so I added some mist, a monochromatic title and used some of the tags and bits and pieces from a piece of 12 by 12 embellishment paper to mat my photo. I added a few bits and bobs and called it d.o.n.e.

These kits are awesome! If you aren't a subscriber I believe that the store is increasing their quantities soon so sign up now! Get your kit today before it's too late and they're all gone.

xoxo
K


Wednesday, September 4, 2013

Another month...

...another design team kit.

September's was a good one too. Filled with Maya Road chipboard polaroid pieces, My Mind's Eye chalkboard paper, cream thickers & gold Studio Calico stars amongst other things.

I have a few layouts to share this month and one mini-album that I'll be sharing over the next few days.

IMG_4049

This one uses the chalkboard paper and I love it. I used the new Hero Arts unicorn (white) ink and a very old set of alpha stamps to create the title. I did a little sewing on the top and bottom of this one to attach my pieces of the pink heart pattern paper. A few little flags and some buttons & stars at the top for a little something something.

IMG_4047

For this layout I used the tags from the 12 by 12 piece of paper to create a background, then matted my 4 photos onto the pink cardstock. I also added a little embellishment cluster using the polaroid chipboard a button and a word cut out from the same 12 by 12 pattern paper as the tags. I love those big sheets that you can cut apart and use for embellishments.

One more for today-

IMG_4046

For this layout I wanted to do soemthing a little more monocromatic so I stuck with the krafts and neutrals and added little bits of blue picked up from the water in the picture and a tiny bit of green for good measure. This layout is very simple. I wanted to try something a little different for my title, angling it around the corner of my picture and added the little 'snapshot' stamp and polaroid chipboard to balance it with the 'Bahamas' on the other side. I also added some sequins in this page here and there which was a delightful little surprise in this month's kit!

This month's kit was a great one. I'll be back to share my other layouts tomorrow and I have a mini album I'll be sharing soon too!

xoxo
K


Tuesday, August 27, 2013

Another celebrity at The Paperie

So our local store, The Paperie, has been knocking it out of the park this year with celebrity visits from paper crafting peeps!

In March they brought scrapbooker and product designer, Kelly Purkey to us for some layouts and a mini album.

This month they did it again, bringing mixed media guru and product designer Dina Wakely in for a weekend of art journaling and mixed media messiness.

IMG_8792

I only attended Sunday's workshop on Art Journaling but from what I heard Saturday's classes were a huge hit as well. Dina was funny! And while I'll be the first to admit that what she creates is NOT my area of strength or expertise, I did appreciate how her art came together and certainly learned a lot. I'm not sure I'm sold on buying up all the dylousion inks, stencils & acoutrement that accompanies mixed media but that's another post for another day.

Today I'd like to share two of the pages that I made in the class that turned out okay to my liking.

IMG_4050

This one was my favourite. When all else fails just put a bird on it! If you're a Portlandia fan you know what I'm talking about folks. If not, go check it out. It's hilarious. Also, the circles. I like the circles.

IMG_4051

And this one wasn't so bad either. I like the bright, vibrant colors. I also like the idea of outlining the silhouettes.

The rest aren't for sharing.

I wonder who The Paperie will bring in next?! I can't wait to see who it will be.

xoxo
K


Tuesday, July 16, 2013

The Paperie: July Club kit Part Deux

Yesterday I shared a few layouts from the July kit at The Paperie. Today I'm sharing the rest.

E has a lookout station on our deck. He keeps an eye on the neighbourhood's going-on's from here and it's pretty cute. Trying out some more 8 1/2 by 11 layouts again this month.

IMG_3532

IMG_3539

A fun- and messy- sushi date with Allison & L when they came home for a visit in May gave me a great subject for this layout. This layout was inspired by one I've pinned here by Sasha Farina. While she actually stitched her embroidery I just drew my lines in, tracing by using a 2" square. 


IMG_3531
IMG_3542

And last but not least, a layout with a few pics from a skype date with L. This layout was also inspired by a pin. I loved all the little strips of paper and added some washi tape in my version as well. I love all the bits and pieces too like the the badge, butterflies & label stickers. 

IMG_3525

And that's July's kit.

xoxo
K


Monday, July 15, 2013

The Paperie: July Club Kit

The July kit went live at The Paperie this past week but I haven't shared the layouts I created here on my blog.

Honestly, it feels like ages since I created these because I had them finished and submitted to the store in mid-June!

So you're getting half today and half tomorrow-

First up, a layout about meeting dolphins. Yep we did. While we were in Freeport, Bahamas in May we crossed something off my bucket list. It was so cool. The papers in this kit were perfect for these pics of the dophin encounter. I threw in a little orange for a pop of color.

IMG_3527

IMG_3549

A little adventure with our friends at 3 Pond Barron produced some great pics and a fun story-let's just say that Eugene's buddy really, really liked him! ;) So, I wanted to use a repeated circle element here to match the paper and I had already used the green cardstock to create circles for the scallop at the bottom of the previous layout. So, I rolled with it.

IMG_3530

I loved the way all the pics fit perfectly- I trimmed down the photos from little 2" pics- and added a little pattern paper and a badge in one circle. I also added a little wood veneer doggie because it suited the page so perfectly!

IMG_3545

The journaling for this layout was written on my birthday on my ipad. I wanted to chronicle where I was one that date. The pic was taken on June 1st for my birthday dinner. I love the orange + green + yellow combination.

IMG_3524

IMG_3552

I love that the three layouts above have something in common but are also very different. The Paperie is awesome at creating kits that enable you to produce a number of different pages yet all come from the same group of products. They recently announced they are going to take their card kit monthly so there's truly soemthing for everyone now! Check out all the details on their blog!

Speaking of the store-I'm teaching a kids class tomorrow using Amy Tangerine's daybook with a ton of techniques. There's still room to sign up so if you're interested call the store.

Stay tuned tomorrow for the rest of the layouts!

xoxo
K


Wednesday, May 8, 2013

The Paperie Card Kit: Part 2

I'm sharing a few more layouts today that were made using The Paperie's new card kit. If you missed it, I shared a few yesterday as well.

IMG_3226

Simple but effective. Lots of pattern paper in this one. I used three large flags and a piece of pattern paper to anchor my photos. I also added a few yellow brads.

IMG_3233

M & I love a good food truck. Last summer we finally tried Long Dick's Sausage Emporium here in St. John's. And you can get your head out of the gutter-Long Dick was the nickname of a very famous rum-runner from the 1800's. It is a pretty eye-catching name though huh?! The verdict-the sausages were delicious. If you're local we highly recommend them!

The last layout I created was inspired by this layout I pinned a while ago. I loved the triangle design so I used some different pattern papers to create a similar design across the bottom.

IMG_3225

I included a brad in between each of the triangle groupings.

IMG_3234

A few little letters for my title (letters aren't included in the kit but we all have them in our stash) and I called this layout complete.

IMG_3235

My father took this impromptu photo of my mom and I when we were visiting him in the hospital in December. We were looking for a sliver lining to the necessary surgery he had to have after a sudden cancer diagnosis and he jokingly said as he took the picture "this is our souvenir". I'm happy to report that my Dad is cancer-free and we're hopeful that this will be the last 'sounvenir' we'll need from the hospital any time soon!

Check out The Paperie's blog for all the cards that Wendy made using the card kit. She made a whole stack of them and they are super cute! I have to say that while 8 1/2 by 11 is a challenge for me I really liked working with this size. The card kit would also be awesome for creating mini-albums if you are a mini lover like me! 

Have a great Tuesday!

xoxo
K