
I've worked on a number of things now including a mirror, two chairs, two bedside tables and a large armoire- all things that we already owned or were bought on the cheap at thrift stores and just needed a little TLC. It's surprising what a little paint will do to a project. I love white but you could use whatever color you want.
I'll use my first piece-a bedside table to illustrate some of the steps. Here's the before pic.
Side Note: I've discovered that I often am so excited to get started that I forget to take the before pic. I need to fix this. It's much more fun to look back at a before when you have an after!

Now, get on your painting clothes folks! You're gonna need 'em!
Find a great spot where you can be messy without destroying anything. I use the basement because it's winter and frankly it's too cold outside right now. I always gather the cast of characters I know I'll need for the project before beginning.
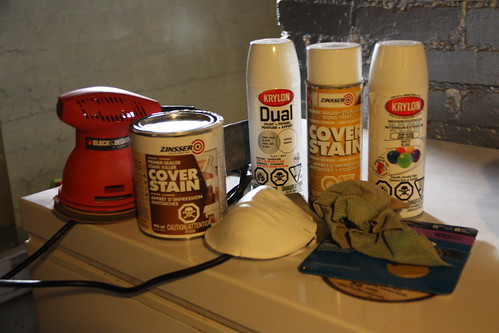
Materials include: an orbital sander, sanding grit, a wet rag, a mask, some primer & regular old latex paint (not pictured), a cheap brush (not pictured), a little mini roller (not pictured), a painting pan, (not pictured). I like to use an oil paint called Cover Stain by Zinsser recommended by Centsational Gal for my primer. It comes in both a paint can and a spray paint. It works well and it's only 1/3 gone since I started my projects so I can say for certainty that it's cost effective. You can also see some of the Krylon spray paint that I've been using for some of my other projects as well.
So first I use an orbital sander, a cheapie that I found at Walmart, to sand the pieces. Get that piece all scratched up!
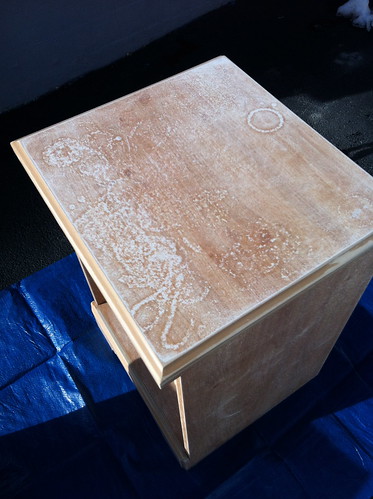
In the case of the mirror I actually used the sanding block because it was too hard to use the sander due to the curved edges. The sander does a nice job of getting rid of the varnish first and believe me-there was a lot of varnish on those bedroom pieces! If you need to use the snading block to get into the smaller spaces.
From there I use a damp cloth to wipe away any excess dust left behind from the sanding process. I tape anything that might need to be masked like the drawer slides.
Then I grab a disposable brush-I picked one up at the dollar store-to do a coat of primer. This is key as it coats the piece before you add the latex paint so the paint has something to cling to. I have been tucking my primer brush in a plastic bag when I finished a coat because I knew I would be doing more projects but normally I would just toss the brush-it isn't worth the work involved to get it back to a clean state to use again!
After it's dry- I usually give it 24 hours for the oil primer to dry- I give it a coat of latex paint with a little mini roller. I just find the roller gives a nicer finish than the brush and it's also faster. I've been using Benjamin Moore's 'cloud white' because I just love white furniture. Give it a few hours and you can go back for round 2. Two coats should do it. I have yet to need a third coat on anything that I've worked on.

Then I just add some new hardware! I've been using the multi-packs that you can buy in Home Depot for the bedroom pieces because I've needed so much of it. It's more cost effective to buy in bulk.
Here's a few more before and after projects I've done-
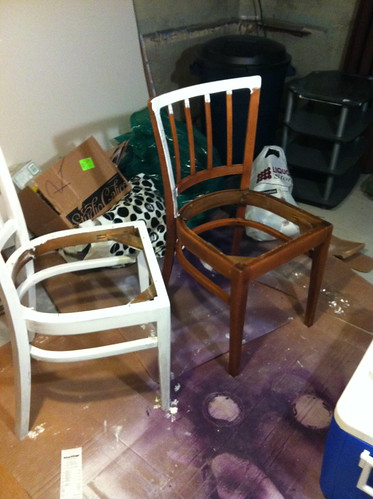
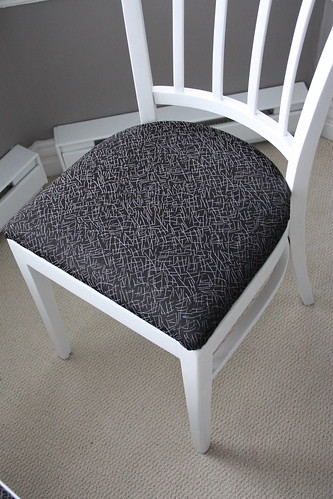
Some chairs I found in M's basement at home. Nobody was using them so they will become a feature for our bay window in our bedroom.
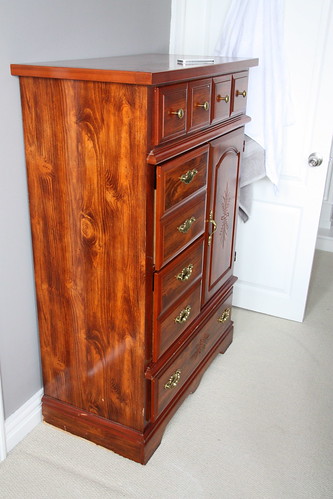
An old armoire that was handed on to us from M's Grandma. It was pretty dated but with a little paint and some new hardware...

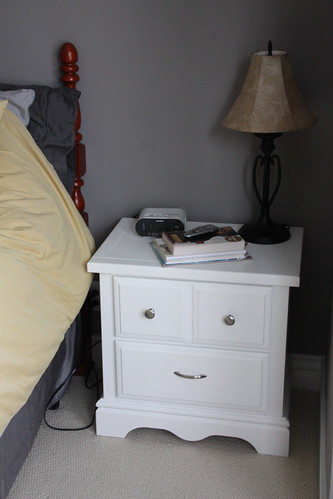
And a bedside table that was part of the same set.

And that's it! Painting your furniture is such an awesome way to rejuvenate a room on a budget!
Just a few little notes on the whole process and what I've learned...
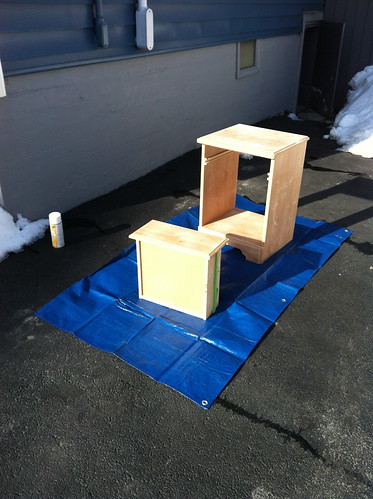
I used the spray on primer for this pieces because it was my first piece and I thought it might be faster. It dripped like crazy and I didn't like having to go back and sand all the drips before painting it. Too many steps. So I stuck with the brush on primer.
Also, just a note but make sure that you are VERY careful when you spray anything whether inside or outside. I now have a tarp outline on my driveway. Yeah.
Also, wear a mask on your face when you use that spray paint. The fumes are brutal.
I hope that you try out your own project. If you do, please link me up or send a picture! I would love to see your re-do's. If you are looking for a great resource check out Centsational girls blog. Like I said, I credit her with everything I've learned!
xoxo
K
Lovely!, I love re-vamping my old furniture I actually have a decoupage share coming up.
ReplyDeleteWOW! Quite the projects you had! Love how the armoire turned out (clever to expose the shelves)!! Thanks for all the tips and ideas :)
ReplyDeletelove them! thanks for sharing the tutorial. I have some of this on my to do list too!
ReplyDeleteThanks for sharing! I do not know where to start when it comes to painting furniture. Now I know! Great job!
ReplyDeleteyou have done a lovely job on these items. What a transformation.
ReplyDeleteI LOVE trash to treasure things and you are fantastic at it! I often buy handles / knobs at local thrift stores and flea markets! I do a lot of frugal re-making myself! Great job! Love Penny Scrap-aholic@blogspot.com
ReplyDeleteyay! great post. I love the idea of repainting furniture but have never tried. I have a huge armoire-y thing that could only be improved by paint. thanks for the inspiration.
ReplyDeleteWow, you are on a painting frenzy, lol.
ReplyDeleteI think I have that exact night table.
Love the how you revamped your furniture.
Wow! Those are great! LOVE the transformations!!
ReplyDeletethanks for the step by step :) I am gonna have to find some furniture to paint!!
ReplyDelete