
Now onto a little DIY.
Anyone who knows me knows that I love lamps. I love the way they can really change a room. This was my first DIY discovery with some lamp bases that I thrifted.
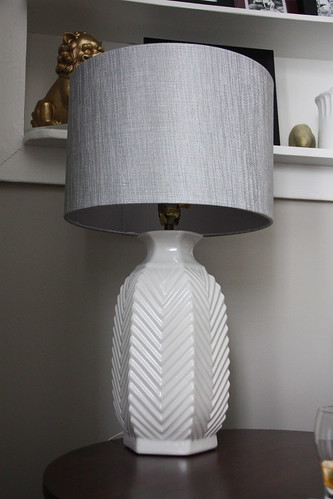
Aren't they awesome? So retro and clean-a little chevron doesn't hurt either. I was originally going to spray paint this lamp but changed my mind after seeing them with these awesome gray linen lampshades that I picked up.
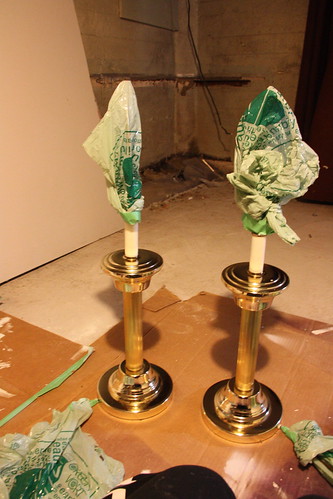
So this week I picked up a couple of gold, beautifully tacky lamps from a thrift store.
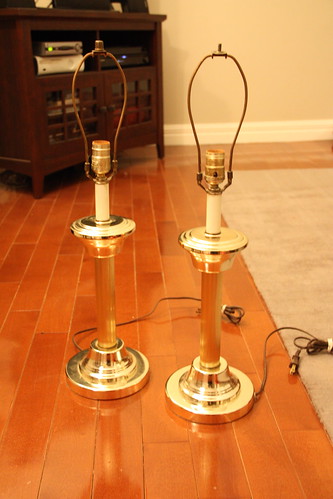
For the rock bottom price of $10-total-these babies came home with me. I liked their shape and the height and they are nice and heavy too so they are good lamps but they just needed a little TLC.
I also needed lampshades and I was going for something a little 'different'. I had my hands on some nice taupe shades at Homesense when M spotted these white puppies in this lovely square-ish shape. Very different but plain.

It started out looking like this-
So here's what I did with it all.
You will need a few basic supplies: spray paint- I like Krylon-, a roll of painters tape, some grocery bags, wet wipes and a face mask.
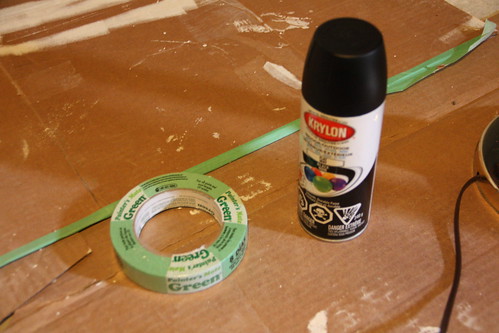
First I made sure they both worked when I got them home. This is key. They did. So I took them down to my 'workspace' a.k.a the basement in all it's murky glory. I taped them up with some grocery bags to cover the parts that weren't being painted.
I gave them a quick wipe with a wet wipe and wiped them down to dry with a rag to eliminate any dust.Then I used Krylon spray paint in black matte and sprayed them both down. It only
takes 10 minutes for the paint to dry and I gave them a second coat as well about 20 minutes later.

And that was the base.
Then I proceeded to dress up the lampshade a little with some ribbon that I had in my stash that matches a little bit of blue from our duvet cover.
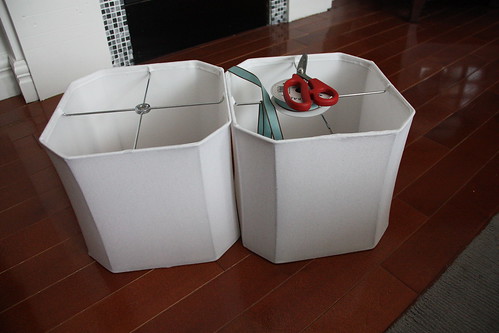
So with a few glue dots I positioned the ribbon around the base and the top of the lampshades.

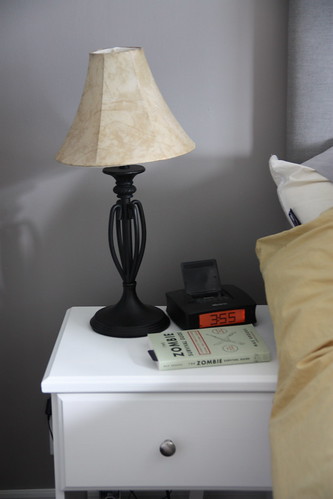
I took off all the tape and bags, added the lightbulbs and topped the lamps with their shades. Done.

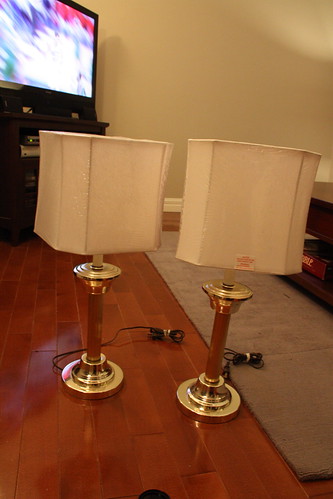
This was the lamp that was on our bedside tables before.
They were small and although the shade matched the bed clothes, the style of them didn't suit the look we were going for in the room.
And now the bedside table looks like this.

I like the height of the lamps. They are big and chunky. They also give off some great light because of the white shades.
And that's this weeks DIY. Try a little lamp project-they are cheap and easy to do and a great way to make a room your own space.
Also, as a side note, I would love to try something like this. I'm perpetually on the hunt for new furniture for the little spots in our house and this is something I would love to try on a piece. We'll see.
xoxo
K
Awesome job! I'm inspired to re-vamp some of my unloved lamps instead sending them to Goodwill. Thanks for sharing.
ReplyDeleteThe transformation is amazing!!! Love them! I will be trying something similar with the exact same lamps that I own but have been in the basement for a while waiting to go to the cabin. They might actually get to stay here instead!
ReplyDeleteFantastic! You did a super job! Have a great weekend!
ReplyDeleteWow! I love the change you created - great job having a vision for those lamps!
ReplyDeleteLooks fantastic! Thanks for the inspo. That book on your bedside table is so funny too... I laughed so much while reading it.
ReplyDeleteWow! Lovely work! The transformation is incredible, and the new lamp looks awesome in your room!
ReplyDeleteI love the touch of blue.
ReplyDeleteSuch a great change to this lamp. Those shades are great
ReplyDeleteWow...great redo!
ReplyDeleteThank you for sharing the DIY, they look fantastic.
ReplyDelete