
I’ve been ages trying to put this tutorial together for some of my KTOL students and it’s finally done. I did a little demo for them during their class in April but promised to do a little blog post for future reference.
I’m trying to keep it simple here for the masses. I am by NO means a photoshop expert-see Ali Edwards digital scrapbooking posts & Cathy Z’s tutorials for something more advanced. But I’ll do my best to show you a simple way to create what I call 2-up & 4-up photos on a 4 by 6 canvas.
First of all, I’m working with Photoshop Elements 8 which is the most current version I have. As far as I can tell, the most recent version of Photoshop Elements has the same symbols for the tools so it shouldn’t be too difficult to figure out.
If you’d like to follow along as I go, you can download a free 30-day trial copy of Photoshop Elements 11 on the Adobe site. It’s right here!
So, first we want to open up photoshop and create a blank canvas. I’m sticking with 4 by 6 photo canvas’ because that is what most people will create to upload for printing but you can also follow the same steps to create a 5 by 7 or any other size you want, just change the length and width to suit your needs.
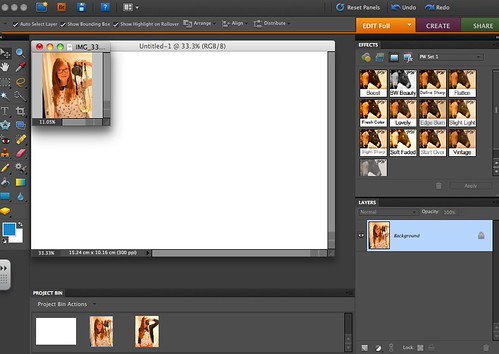
So first go to the ‘File’ button at the top and click on ‘new’. You may also be prompted when you open by a little rectangular screen- click on ‘start from scratch’. Once you hit ‘new’ or ‘start from scratch’ you will get this screen.
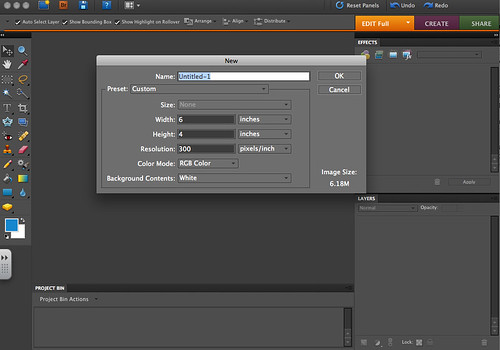
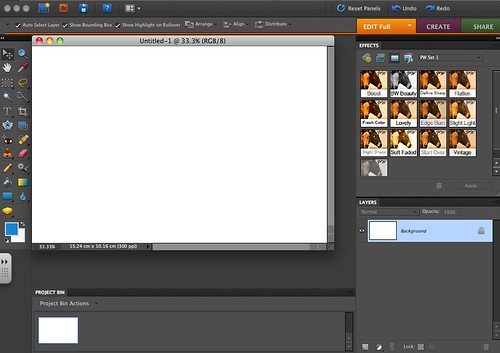
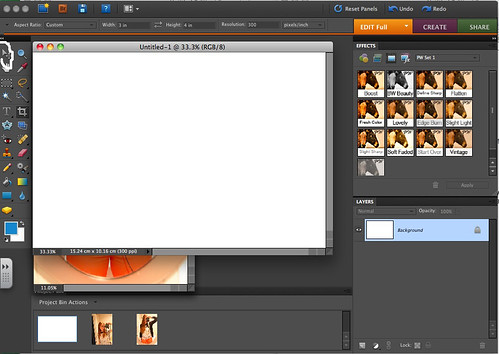
You cant to create a canvas which is 6 by 4 by 300 pixels/inch. Insert all your information here and name your canvas if you like. Hit ‘okay’ to take you to this screen.
Now, we want to open a few photos so we can crop them and add them to this canvas. You can either go to ‘file’ and click ‘open’ or you can hold command + O (Mac) or ctrl + O (PC).
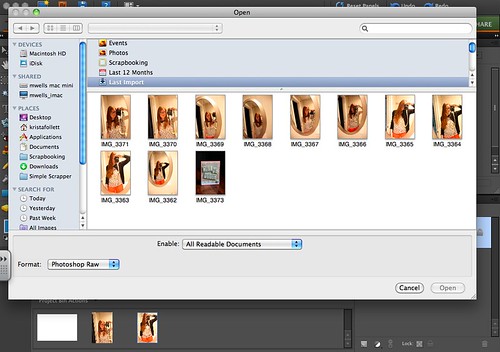
I chose my photos from iphoto but go where ever you store your photos and choose two pictures.
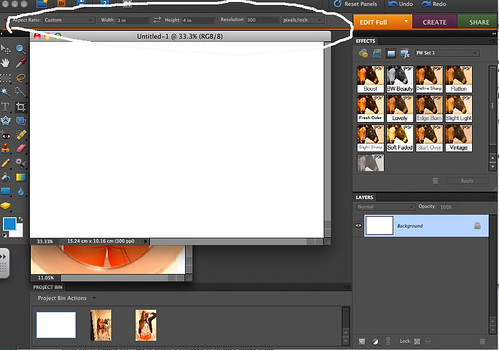
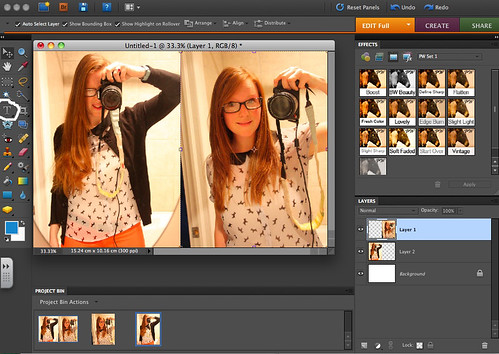
Once they are open you want to crop them-we’re going to make them 3 by 4 vertical pictures. So we’re going to click our mouse on the crop tool. See the tool that’s circled.

After clicking on it you’ll notice that the bar at the top of the photoshop program will change so you can alter your dimensions for cropping.
Always, keep your resolution the same as the canvas you created. We created a canvas with 300 pixels/inch so we’ll continue to use that number for cropping (see: resolution).
Crop your two images-you may notice they get much smaller. That’s okay.
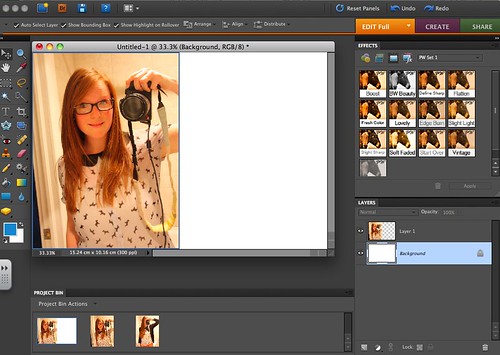
Next we’ll take them and add them to our canvas. Go back to your cursor tool.
Click and drag your photo onto the white canvas. Alternatively, you can hit command + A(mac) or ctrl + A(pc) to highlight the whole thing then hit command + c or ctrl +c to copy & command + V or ctrl + V to paste onto your canvas.

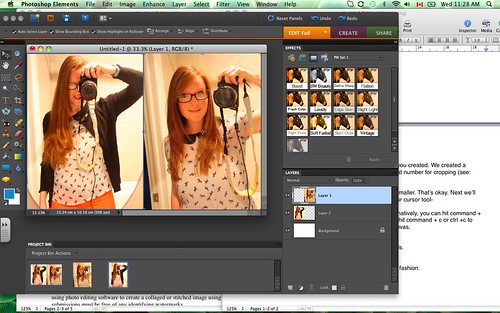
Move your photo around your canvas to suit your needs.
Then move the other one onto the canvas in the same fashion.
You can add text using the ‘T’ tool & brushes or whatever you like.
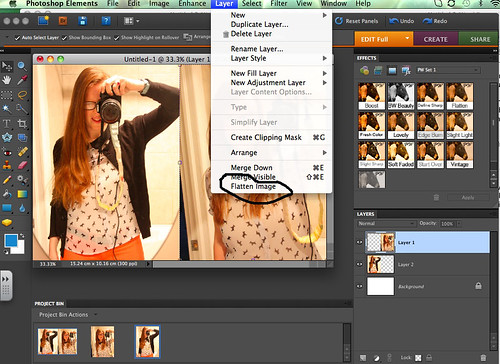
When you’re done go up to ‘layer’ and scroll down to ‘flatten image’ and click there. You’ll notice that all your layers on the right hand side change into one layer. This is what we want in order to save it as a jpg (for easier uploading).
Now, we’ll save the photo. Go to ‘file’ or hit command + S or ctrl + S You’ll see that it wants to save it as a jpg-if it doesn’t say JPG then you need to go back and check that you’ve flattened your image.
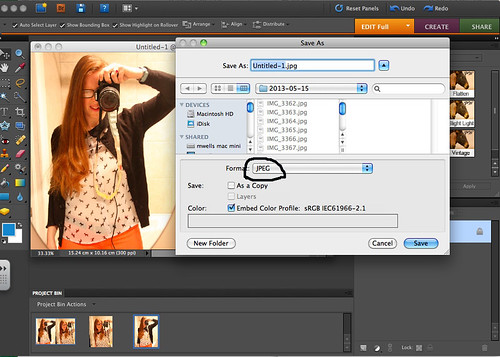
You’ll get this screen- Chose to save it at the maximum quality so you get the best picture even though it’s larger. and hit okay.

And that’s it. All done.
To create a 4-up photo like this one- you just open 4 photos instead of 2 and change your cropping to 2 by 3 by 300 resolution and crop them and drag them onto a 4 by 6 canvas. Here's an example-

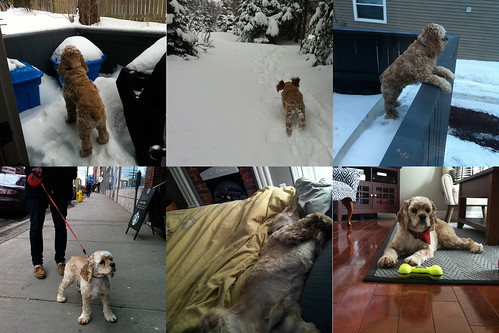
You can also do 2 by 2 by 300 resolution if you open 6 photos and crop them and drag them on a 4 by 6 canvas. Here’s an example of that one-
I hope that you try out this method to get more from your pictures and more bang for your buck. I know that there’s nothing more annoying that printing a bunch of 4 by 6 photos and having to cut them all down. It’s such a waste. And using photoshop is much quicker and convenient at home rather than trying to create the photo collages at the Kodak picture maker in your local drugstore or supermarket. If you create them all at home you just have to hit that beautiful ‘select all’ button when you go to have your pictures developed!
Good luck!
xoxo
K
Thanks for sharing this helpful link. Please check our polaroid photo collage tutorial at http://blog.entheosweb.com/tutorials/how-to-create-a-polaroid-photo-collage-using-photoshop-cs6
ReplyDelete